How to quickly create and configure the Cavuer AI-bot?
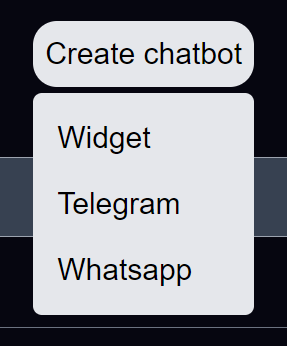
Click the “Create chatbot” button in your personal account and select the messenger.

Creating and setting up a bot widget
Select "Widget" to create a chatbot to connect to your site's widget. The chatbot widget will appear in the list. For further use, you need to configure the bot and connect your Widget. Using the API key created in the profile section.
In the list of your chatbots, select the one you need and go to its settings.

Chatbot settings:
Identifier – your bot’s ID;
Status – the status of the chatbot; to enable it, you need to move the slider to the right and save the settings;
Name – the name of your chatbot;
Model – language model of the chatbot. Three versions of language models are available: gpt-3.4, gpt-4-turbo, gpt-4o. You can read about the differences when using language models in the article. The cost of language models is described in the section Prices.
Chat settings:
Instructions – instructions for your chatbot to follow when communicating with customers. Example instructions: always address the client by name, you represent Cavuer, do not answer questions not related to Cavuer, etc.;
Message sending delay – set the required delay when the bot responds to incoming messages, default is 0.5 seconds;
Code word – set a code word for chatbot responses in groups if necessary. Read more about how the chatbot works in groups in documentation;
Maximum number of tokens in chatbot response - set a limit on the number of tokens in the chatbot response if necessary.
Webhooks (notifications) settings:
Webhook URL – server address for processing notifications;
Webhook Token – use the token when sending requests. The webhook token will be sent to header: x-cavuer-api-key.
When adding documentation, be sure to link the data that was added to the Knowledge Base. To do this, click the “Link data” button and select the required articles.
In the bot settings, go to Interface. The interface displays all active chats and allows you to control the bot's responses, as well as write to the chat on behalf of the connected bot (numbers in the case of WhatsApp). You can disable automatic chatbot responses in a specific chat by clicking the "Disable Chat" button.
Creating and setting up a telegram bot
Select Telegram to create a chatbot. When creating, you need to specify the user name of the bot created in telegram (@username) and token. Connecting a chatbot with AI and communicating with clients is done through a chatbot created in Telegram. In other words, you create a chatbot directly in telegram via BotFather and then connect it to our AI bot. How to create a bot in telegram via BotFather is written in article. After creation, a Telegram chatbot will appear in the list of bots.
Your clients will communicate with your telegram bot. To control the bot's responses and adjust its responses, you can use the Interface tool that we discussed above.
You can also use a chatbot created in Telegram and connected to our AI, like gpt chat in your Telegram. This bot will correspond to the current version of chat gpt without the need to go to third-party resources, register and purchase a subscription, payment will be made for actual requests and responses from the bot.
Telegram bot settings are similar to the bot widget settings.
Creating and setting up a WhatsApp bot
Select WhatsApp to create a chatbot. The process of creating a bot takes time and can last up to 5 minutes. During the creation process, the chatbot will be in the Initialization status. After changing the status to Stopped, the chatbot is ready to work.
Communication with clients in the WhatsApp chatbot is carried out through a valid WhatsApp account. To authorize and start working the bot, you need to connect your current WhatsApp account, to do this, click the “Authorize” button and enter your phone number. A pop-up notification will be sent to your device, go through it and enter the code that will appear in place of the button in the chatbot settings. After authorization, the chatbot status will change to Running. Your AI chatbot is ready to go. Your number is directly connected to the bot; the bot will respond to all users who write to the connected number.
The WhatsApp bot settings are similar to the settings of the bots described above; in the settings, the “Number” field is added, which displays the currently connected WhatsApp account number.
You can also use WhatsApp and telegram bots in groups. Read more about how chatbots work with groups in documentation.