Working with the Knowledge Base
Overview
The Knowledge Base is the source of information that the AI agent uses to answer your customers' questions. Follow the recommendations below to optimize your agent's performance and configure the most accurate and helpful responses.
There are two ways to populate the Knowledge Base:
- Uploading individual articles — files in
.pdf,.docx,.txtformat or text added manually. - Creating collections — loading information from external sources: Website, Yandex Wiki, Confluence.
Method 1 – Uploading individual articles
Go to the Knowledge Base section and click the "Upload data" button in the top right corner. A window with two tabs will open: File and Text.
 Uploading a file
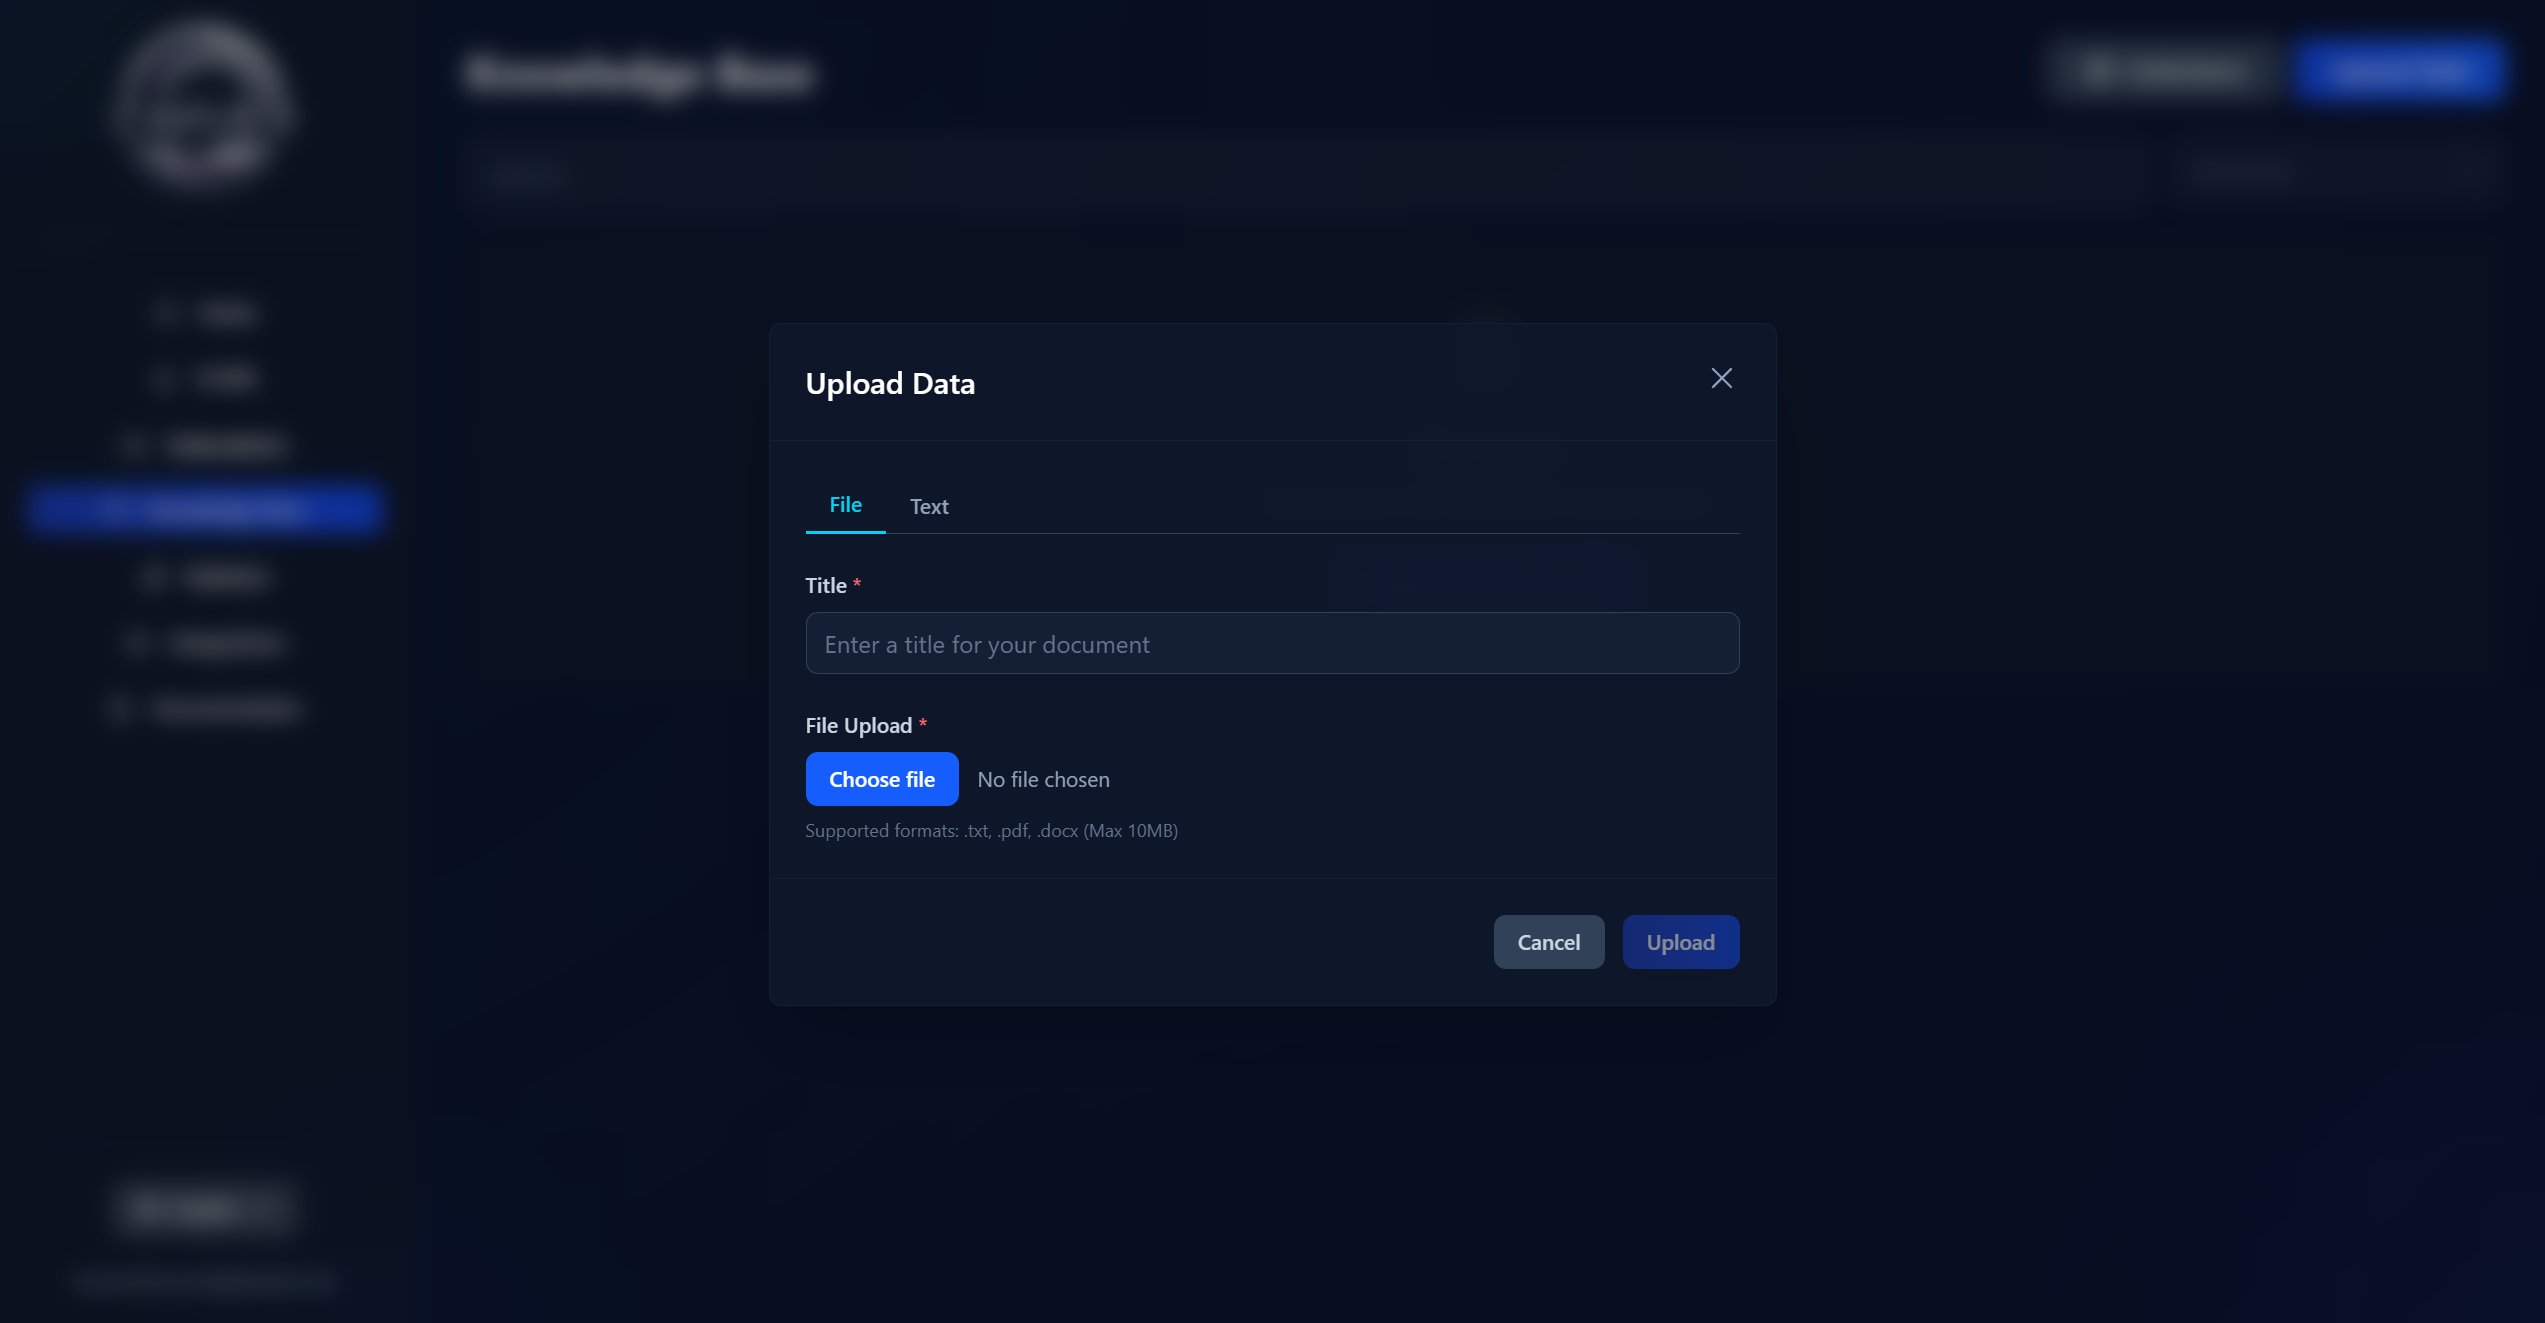
In the "File" tab, enter the document name and select a file from your device.
Supported formats:
- Text files (
.txt) - PDF documents (
.pdf) - Word documents (
.docx)
Limitations
File size limit: 10 MB
Limit on the number of uploaded articles: depends on your subscription plan
 Adding text
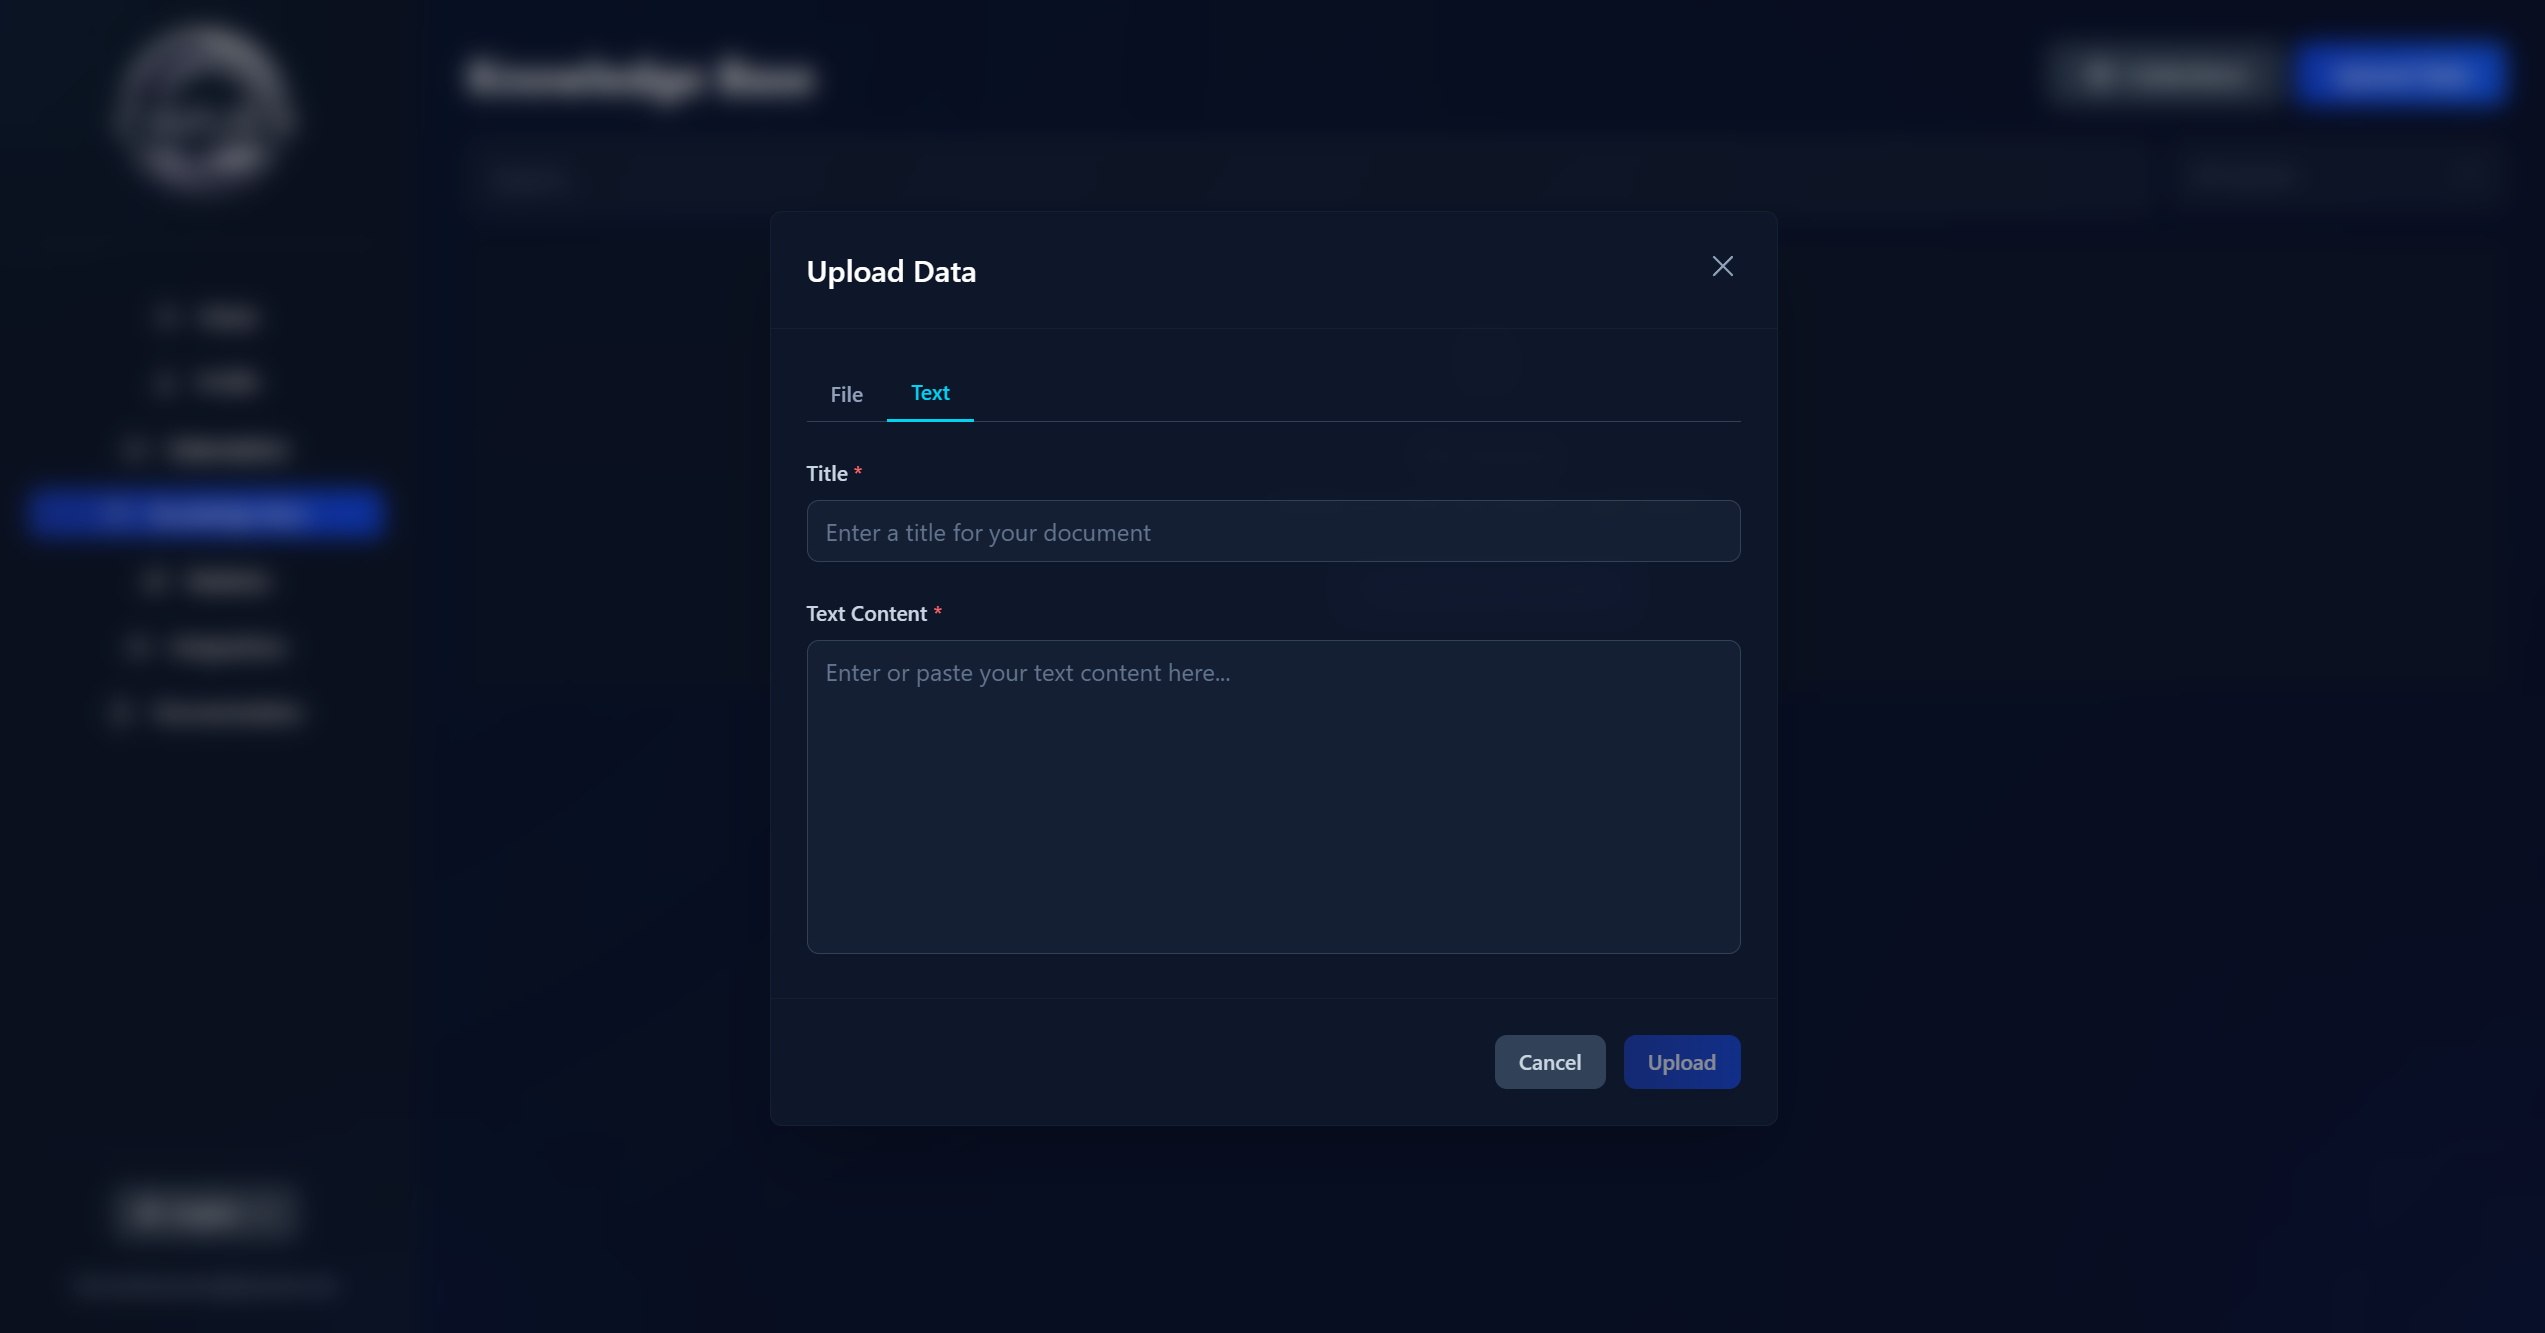
In the "Text" tab, enter a title and paste or type the text content. This method is convenient when you don't have a ready-made file but already have prepared information.
 How the agent uses uploaded data
After uploading, the document content is indexed: the system analyzes the text and generates a description that the agent later uses to find a relevant answer to a customer's question. You don't need to manually specify keywords or descriptions — a clear title and informative content are enough.
 Editing an article
All added articles are displayed in the Knowledge Base section as a list.
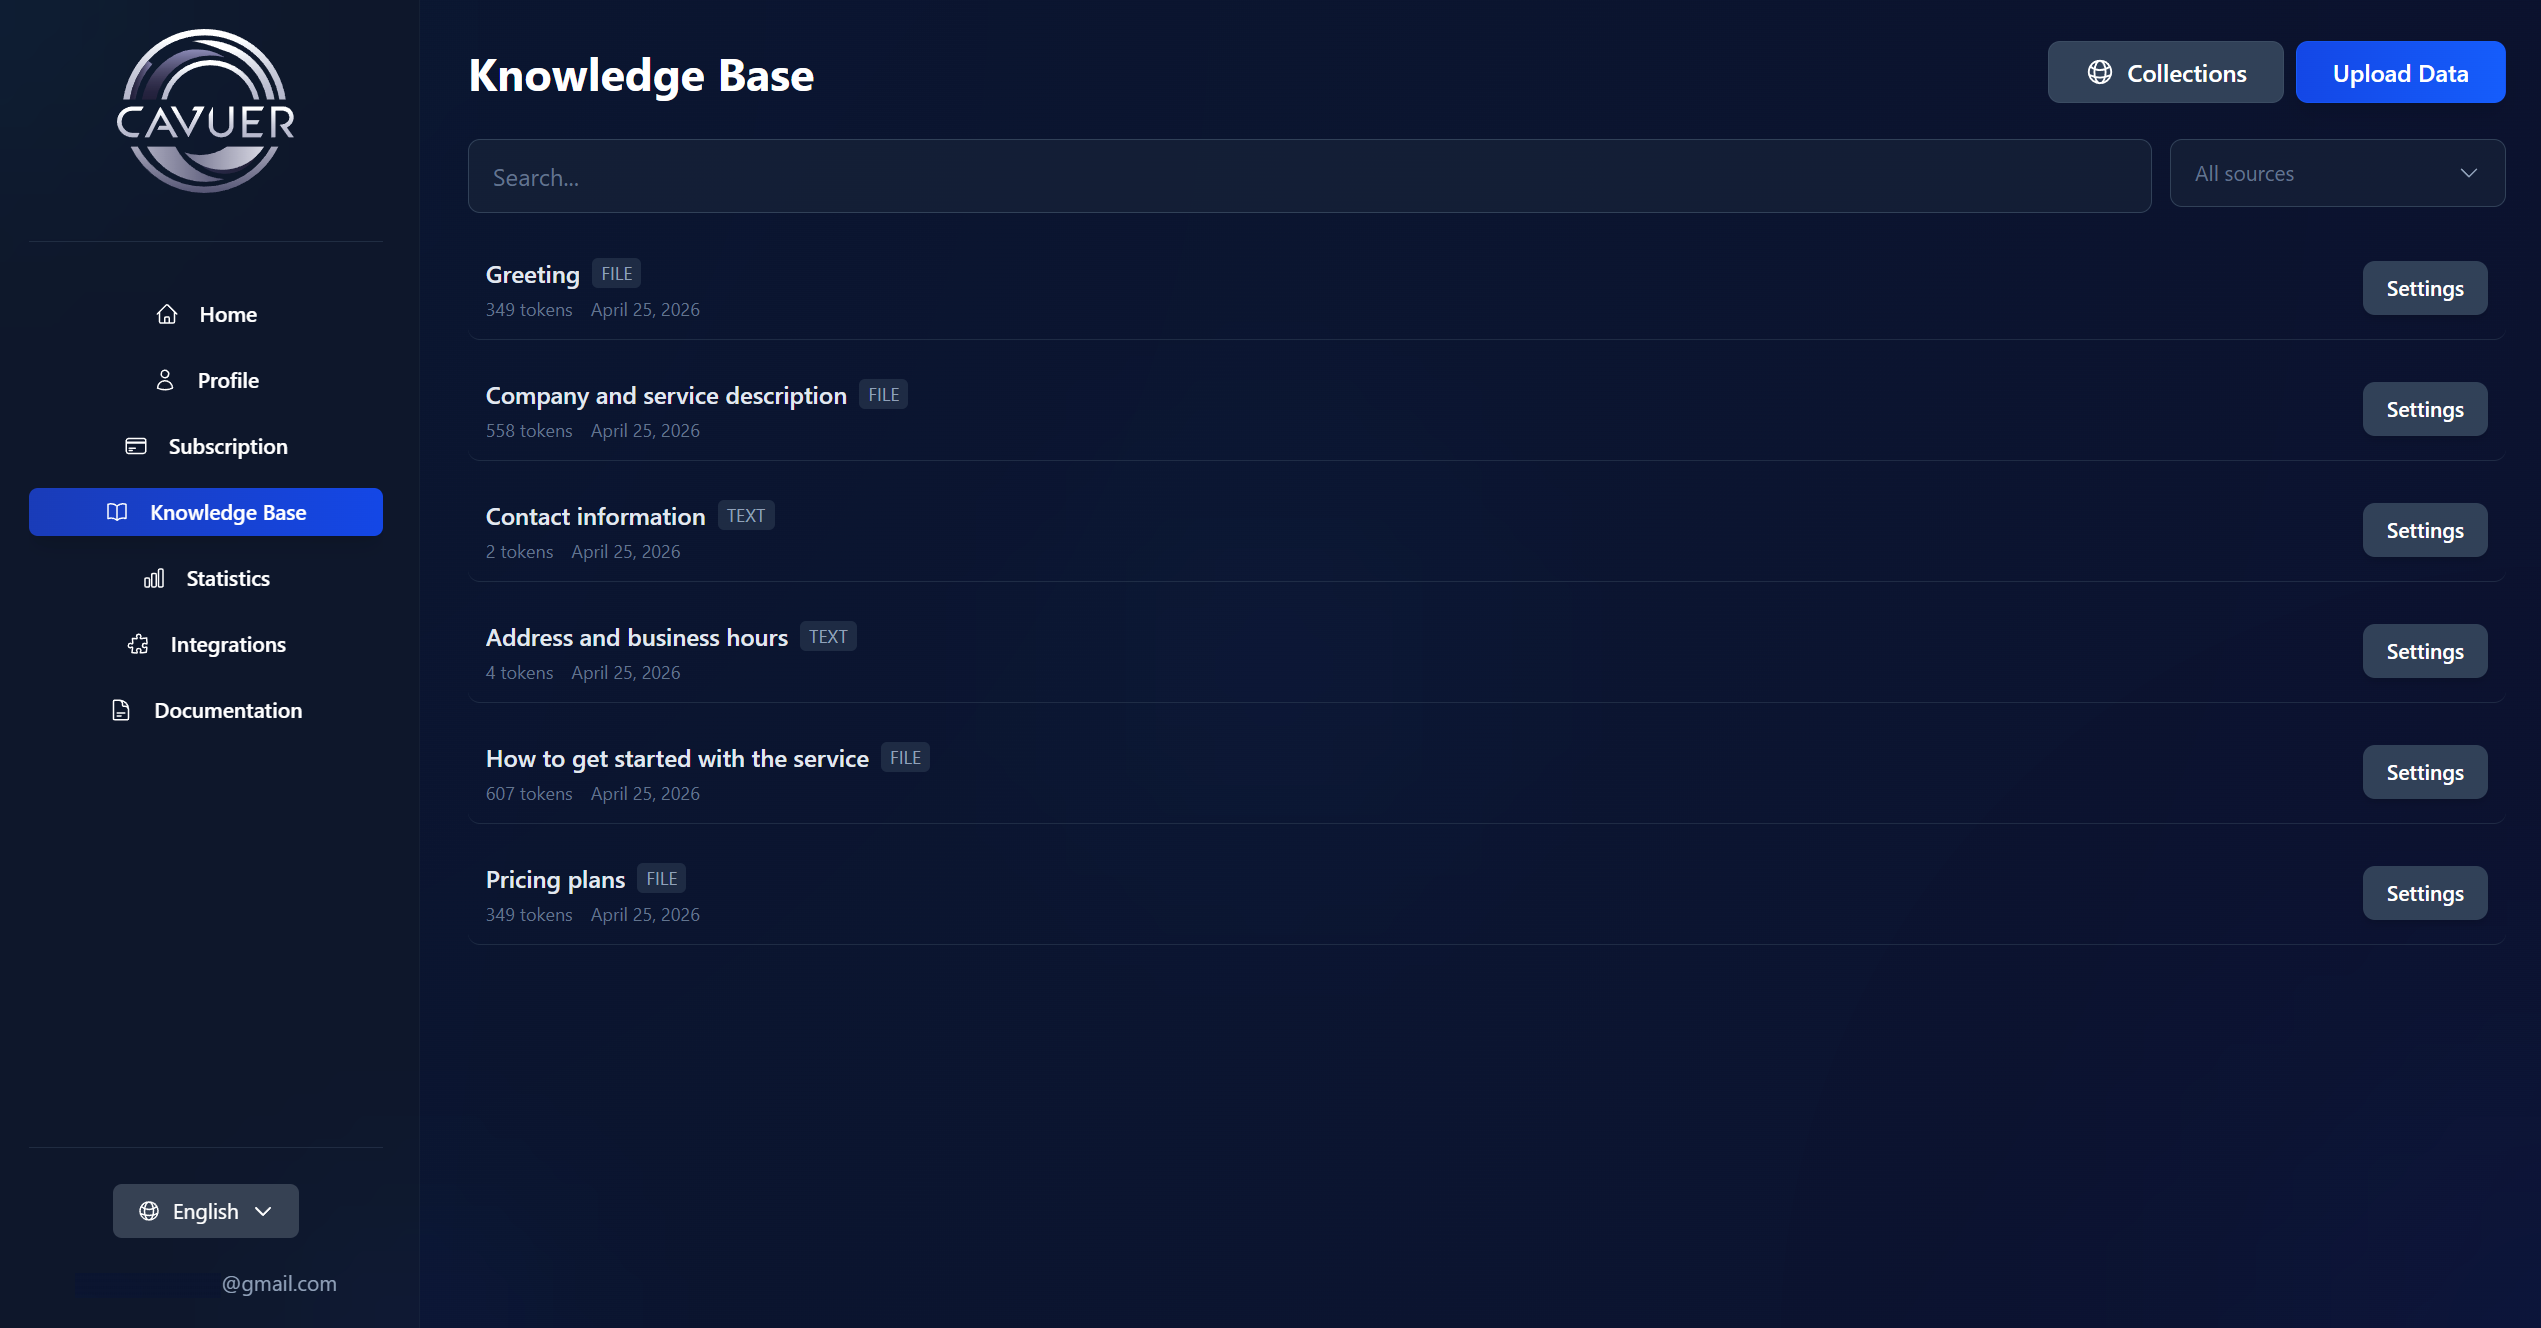
For quick navigation, use:
- Search by article title
- The "All knowledge sources" filter in the top right corner — lets you display either all added articles or only those linked to a specific agent
To open an article, click the "Settings" button next to it in the Knowledge Base list. The following actions are available:
- Editing the text content — suitable for minor corrections and typo fixes; in this case, the search index is not updated
- "Replace source" — completely replaces the document and updates the search index. Use this method for significant content changes
- "Delete data" — completely removes the article from the Knowledge Base
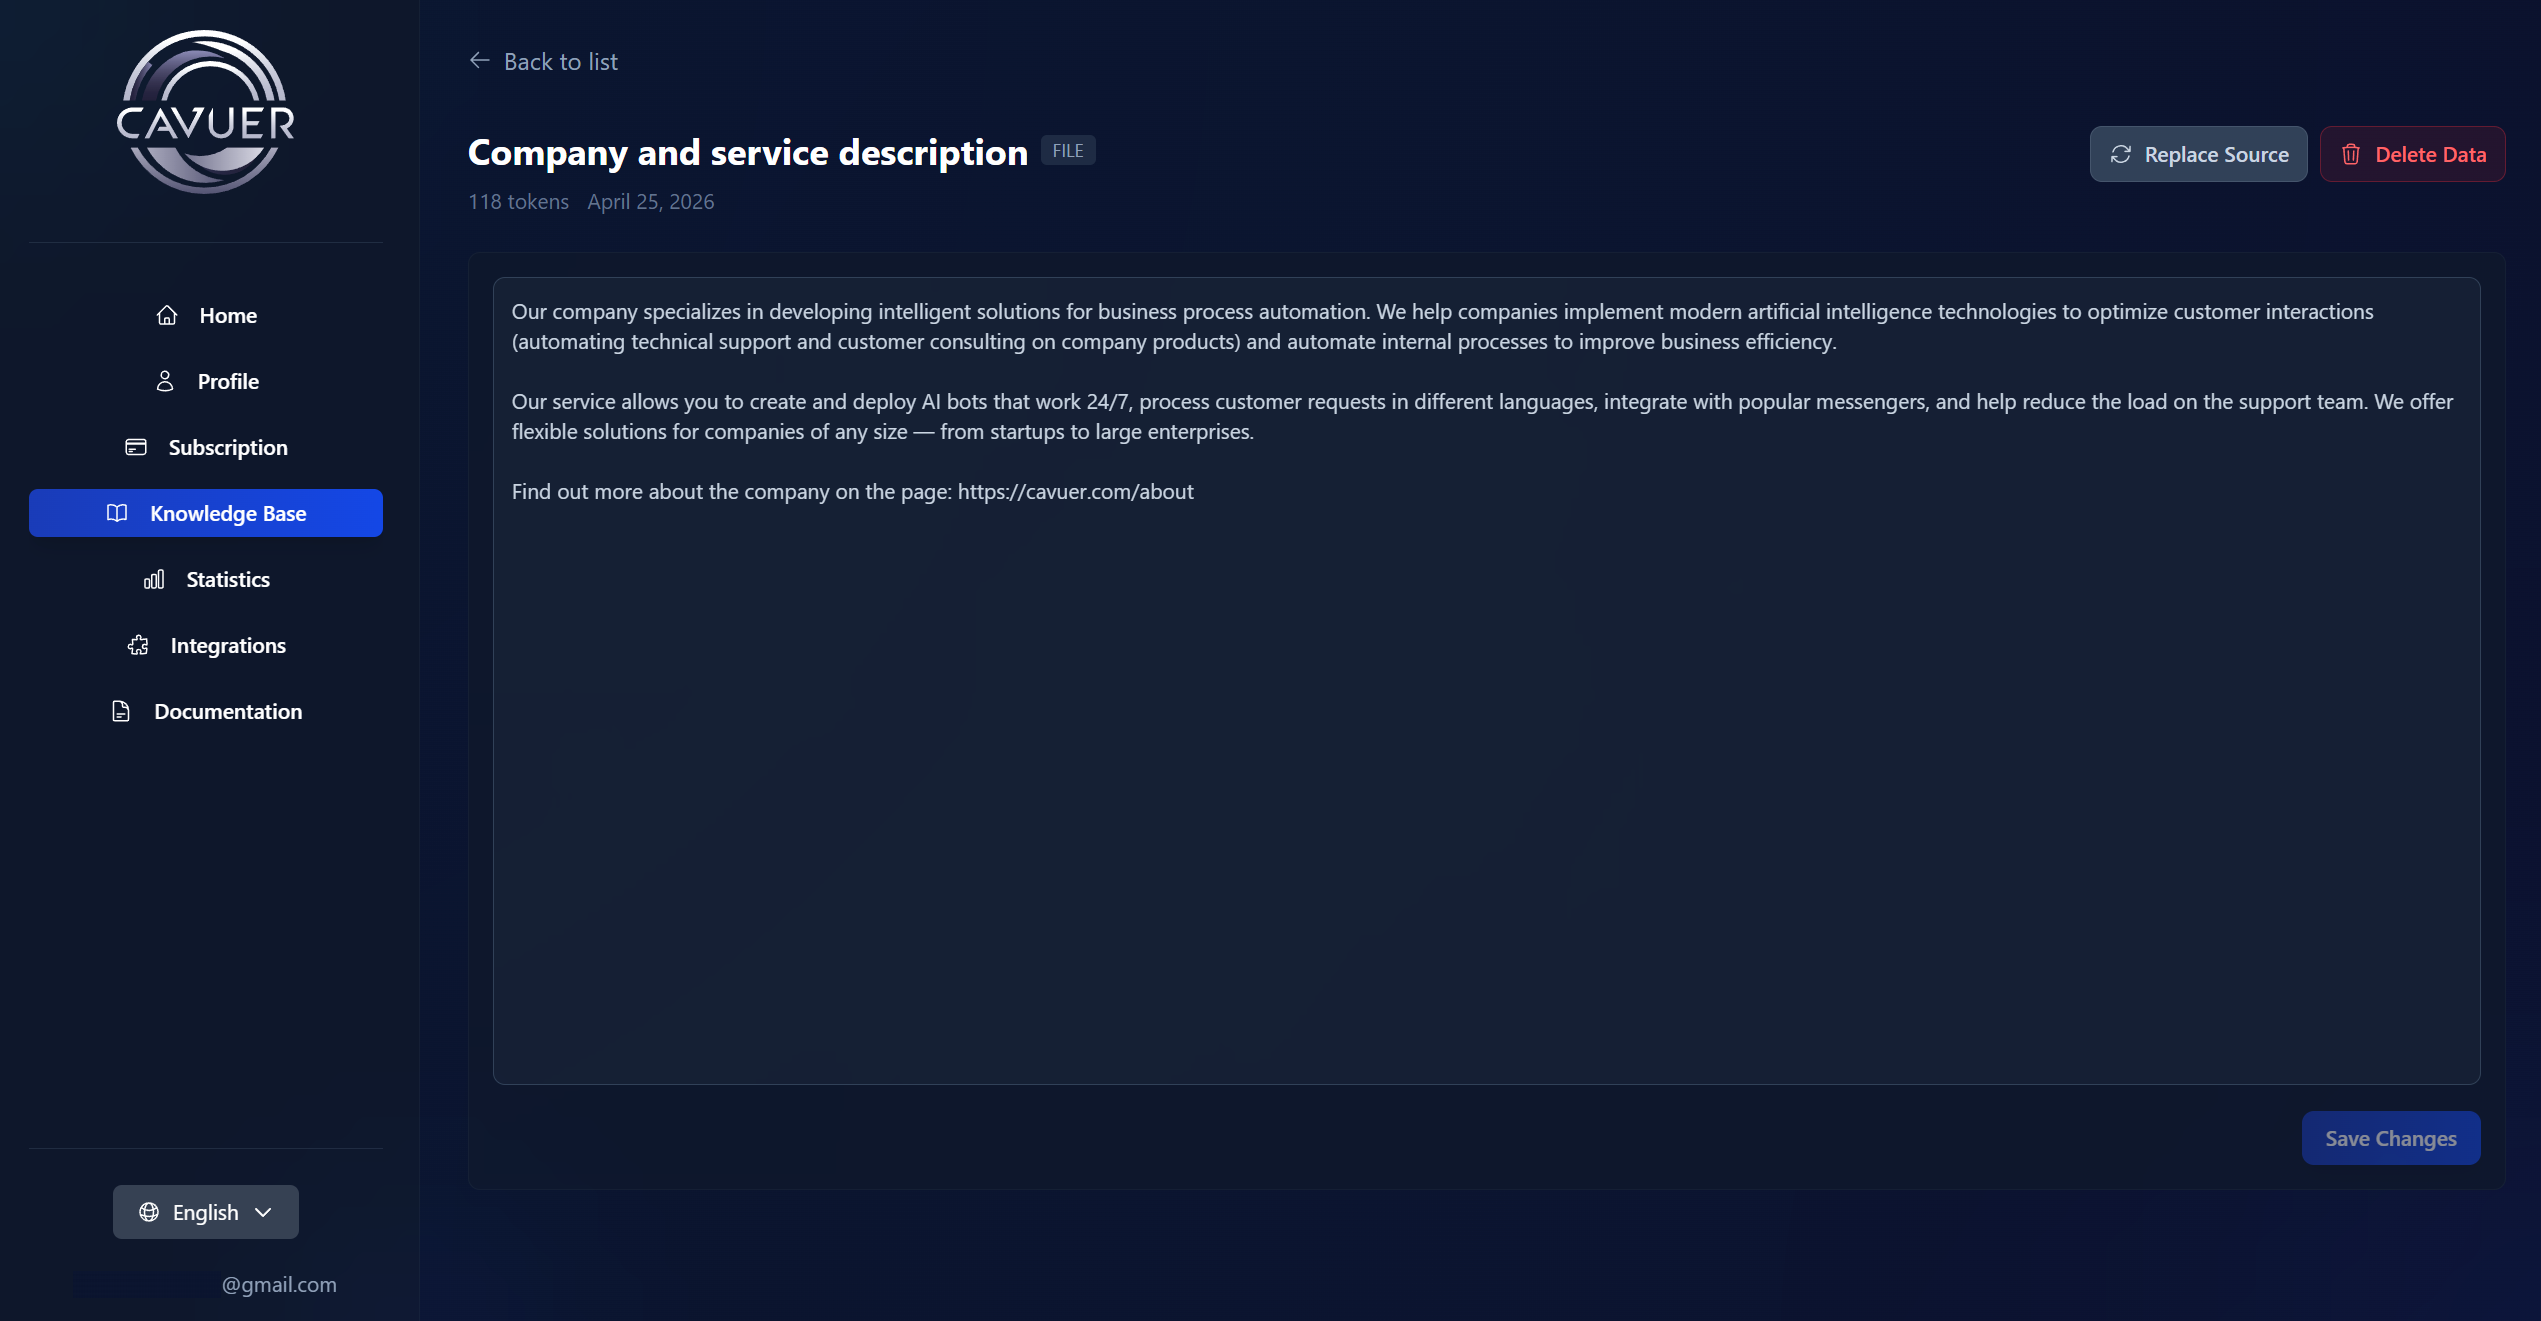
Important
Editing text on the article page does not update the search index and is only suitable for minor corrections. To make the agent use the updated information when searching for answers, completely replace the document via the "Replace source" button.
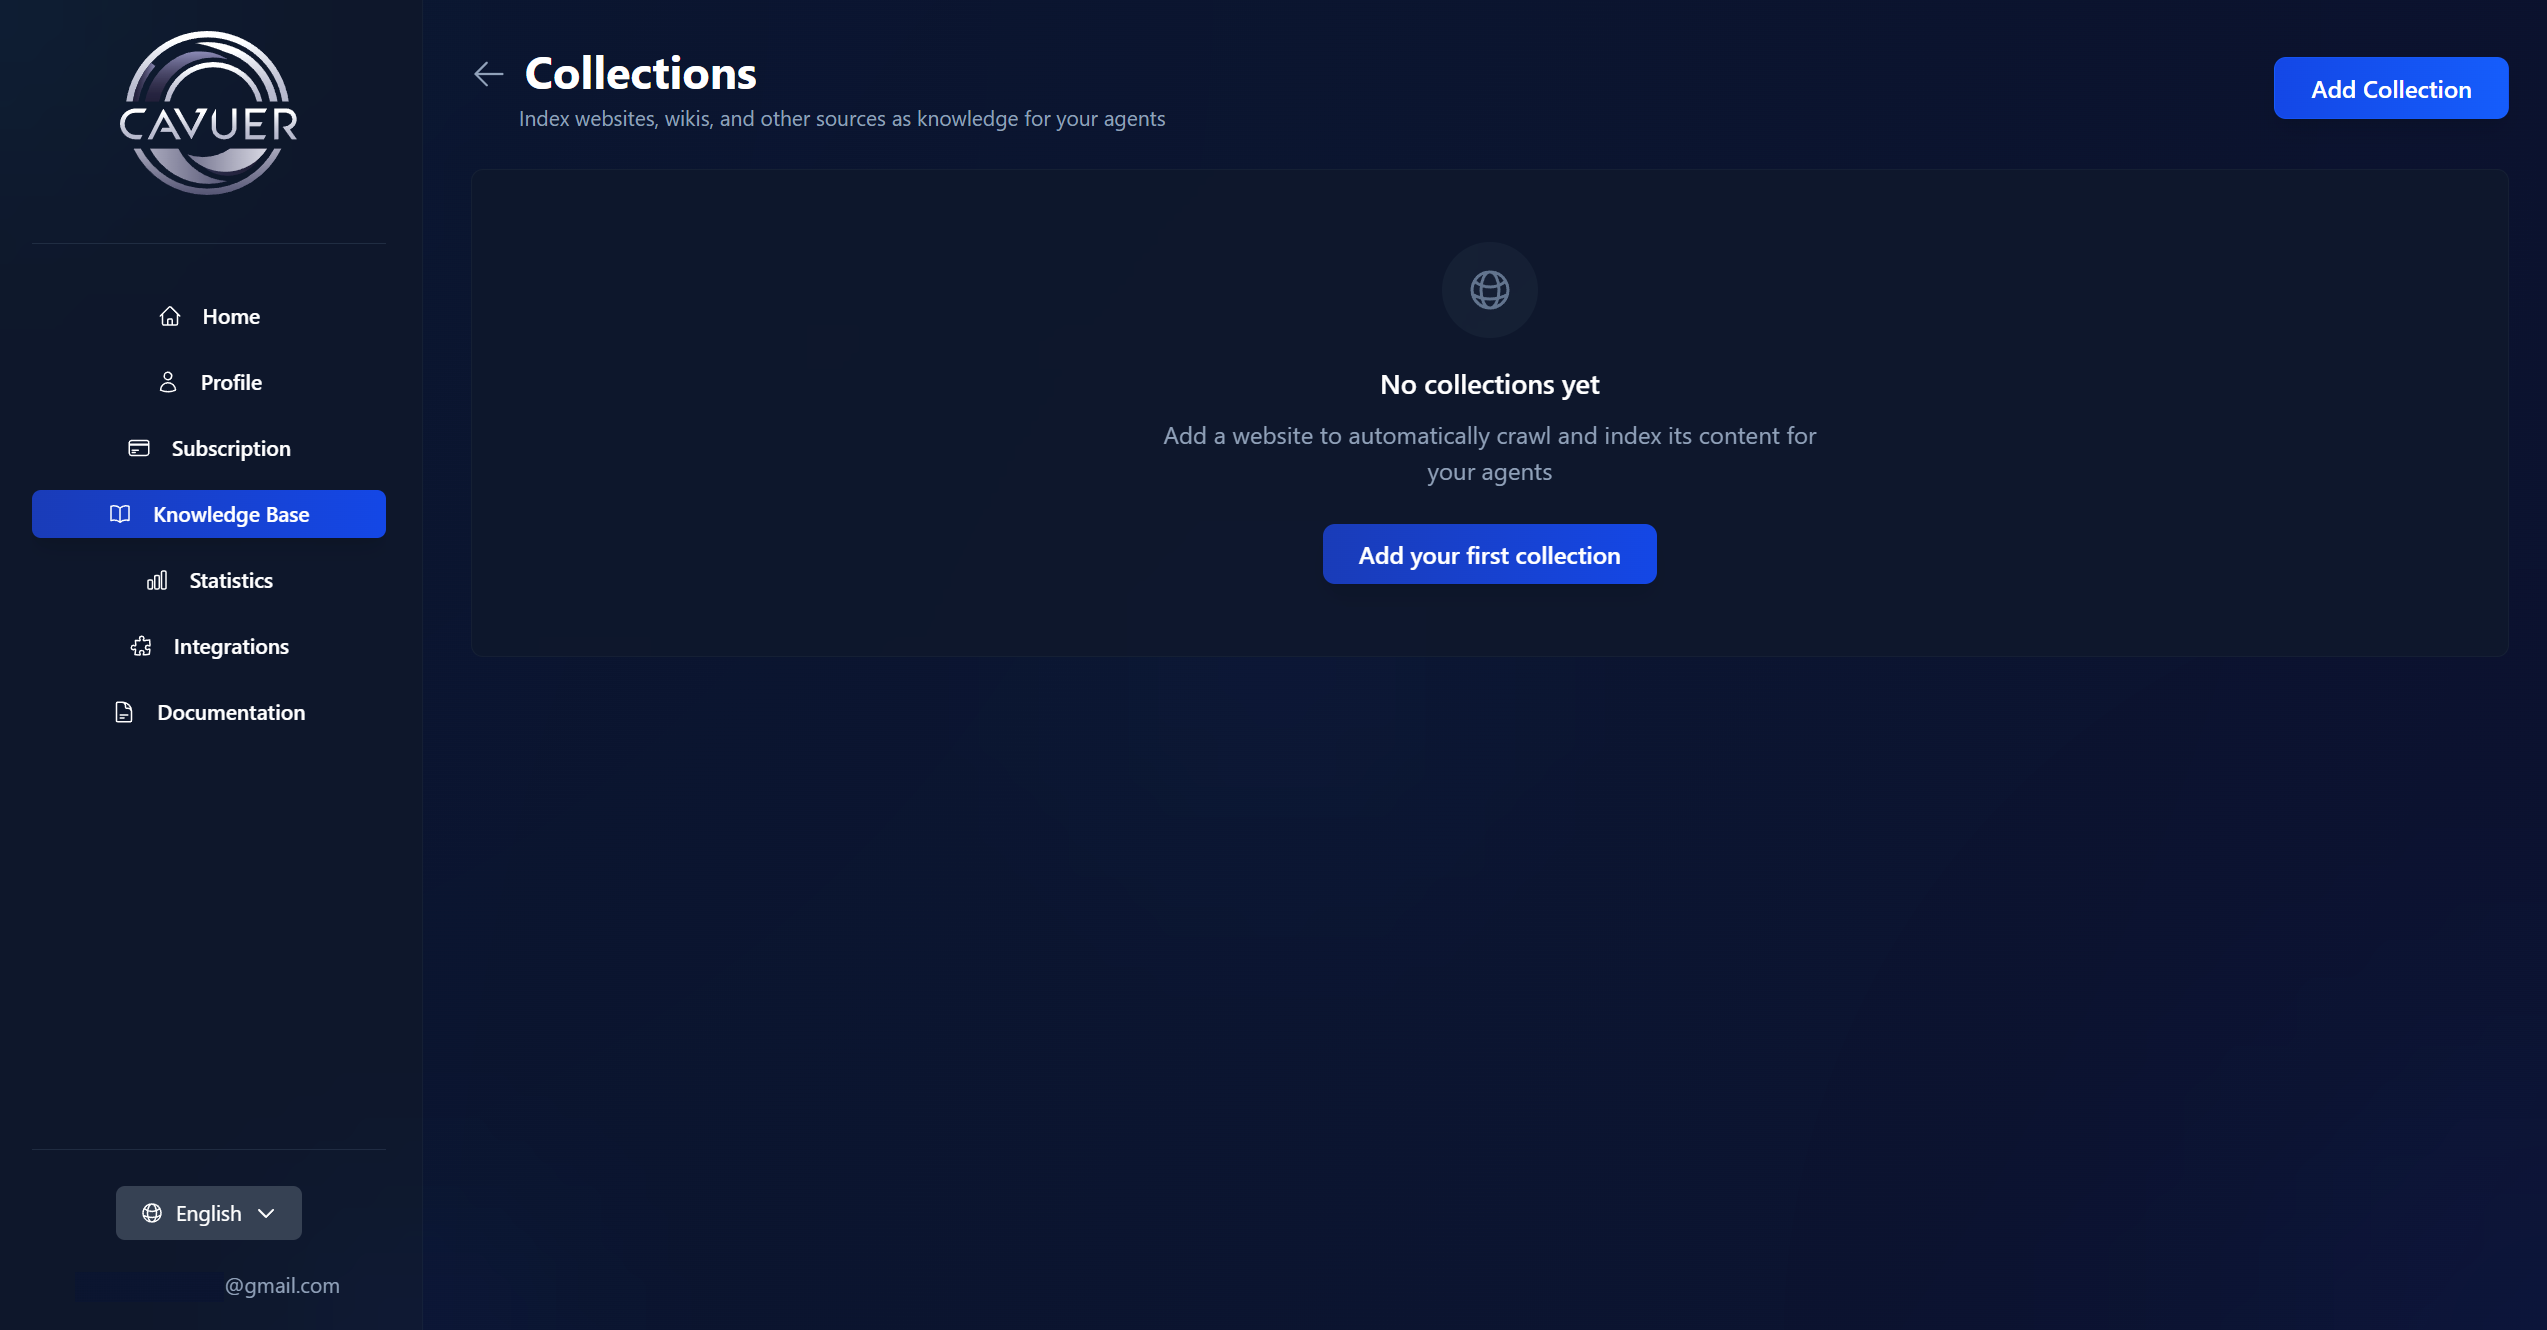
Method 2 – Creating collections
A Collection is an external source that Cavuer periodically scans and indexes. It's suitable when you already have up-to-date documentation on a website, in Yandex Wiki, or Confluence, and you don't want to add it manually.
To open this section, click the "Collections" button in the top right corner of the Knowledge Base page.
Click "Add collection" and select the source type.
 Website
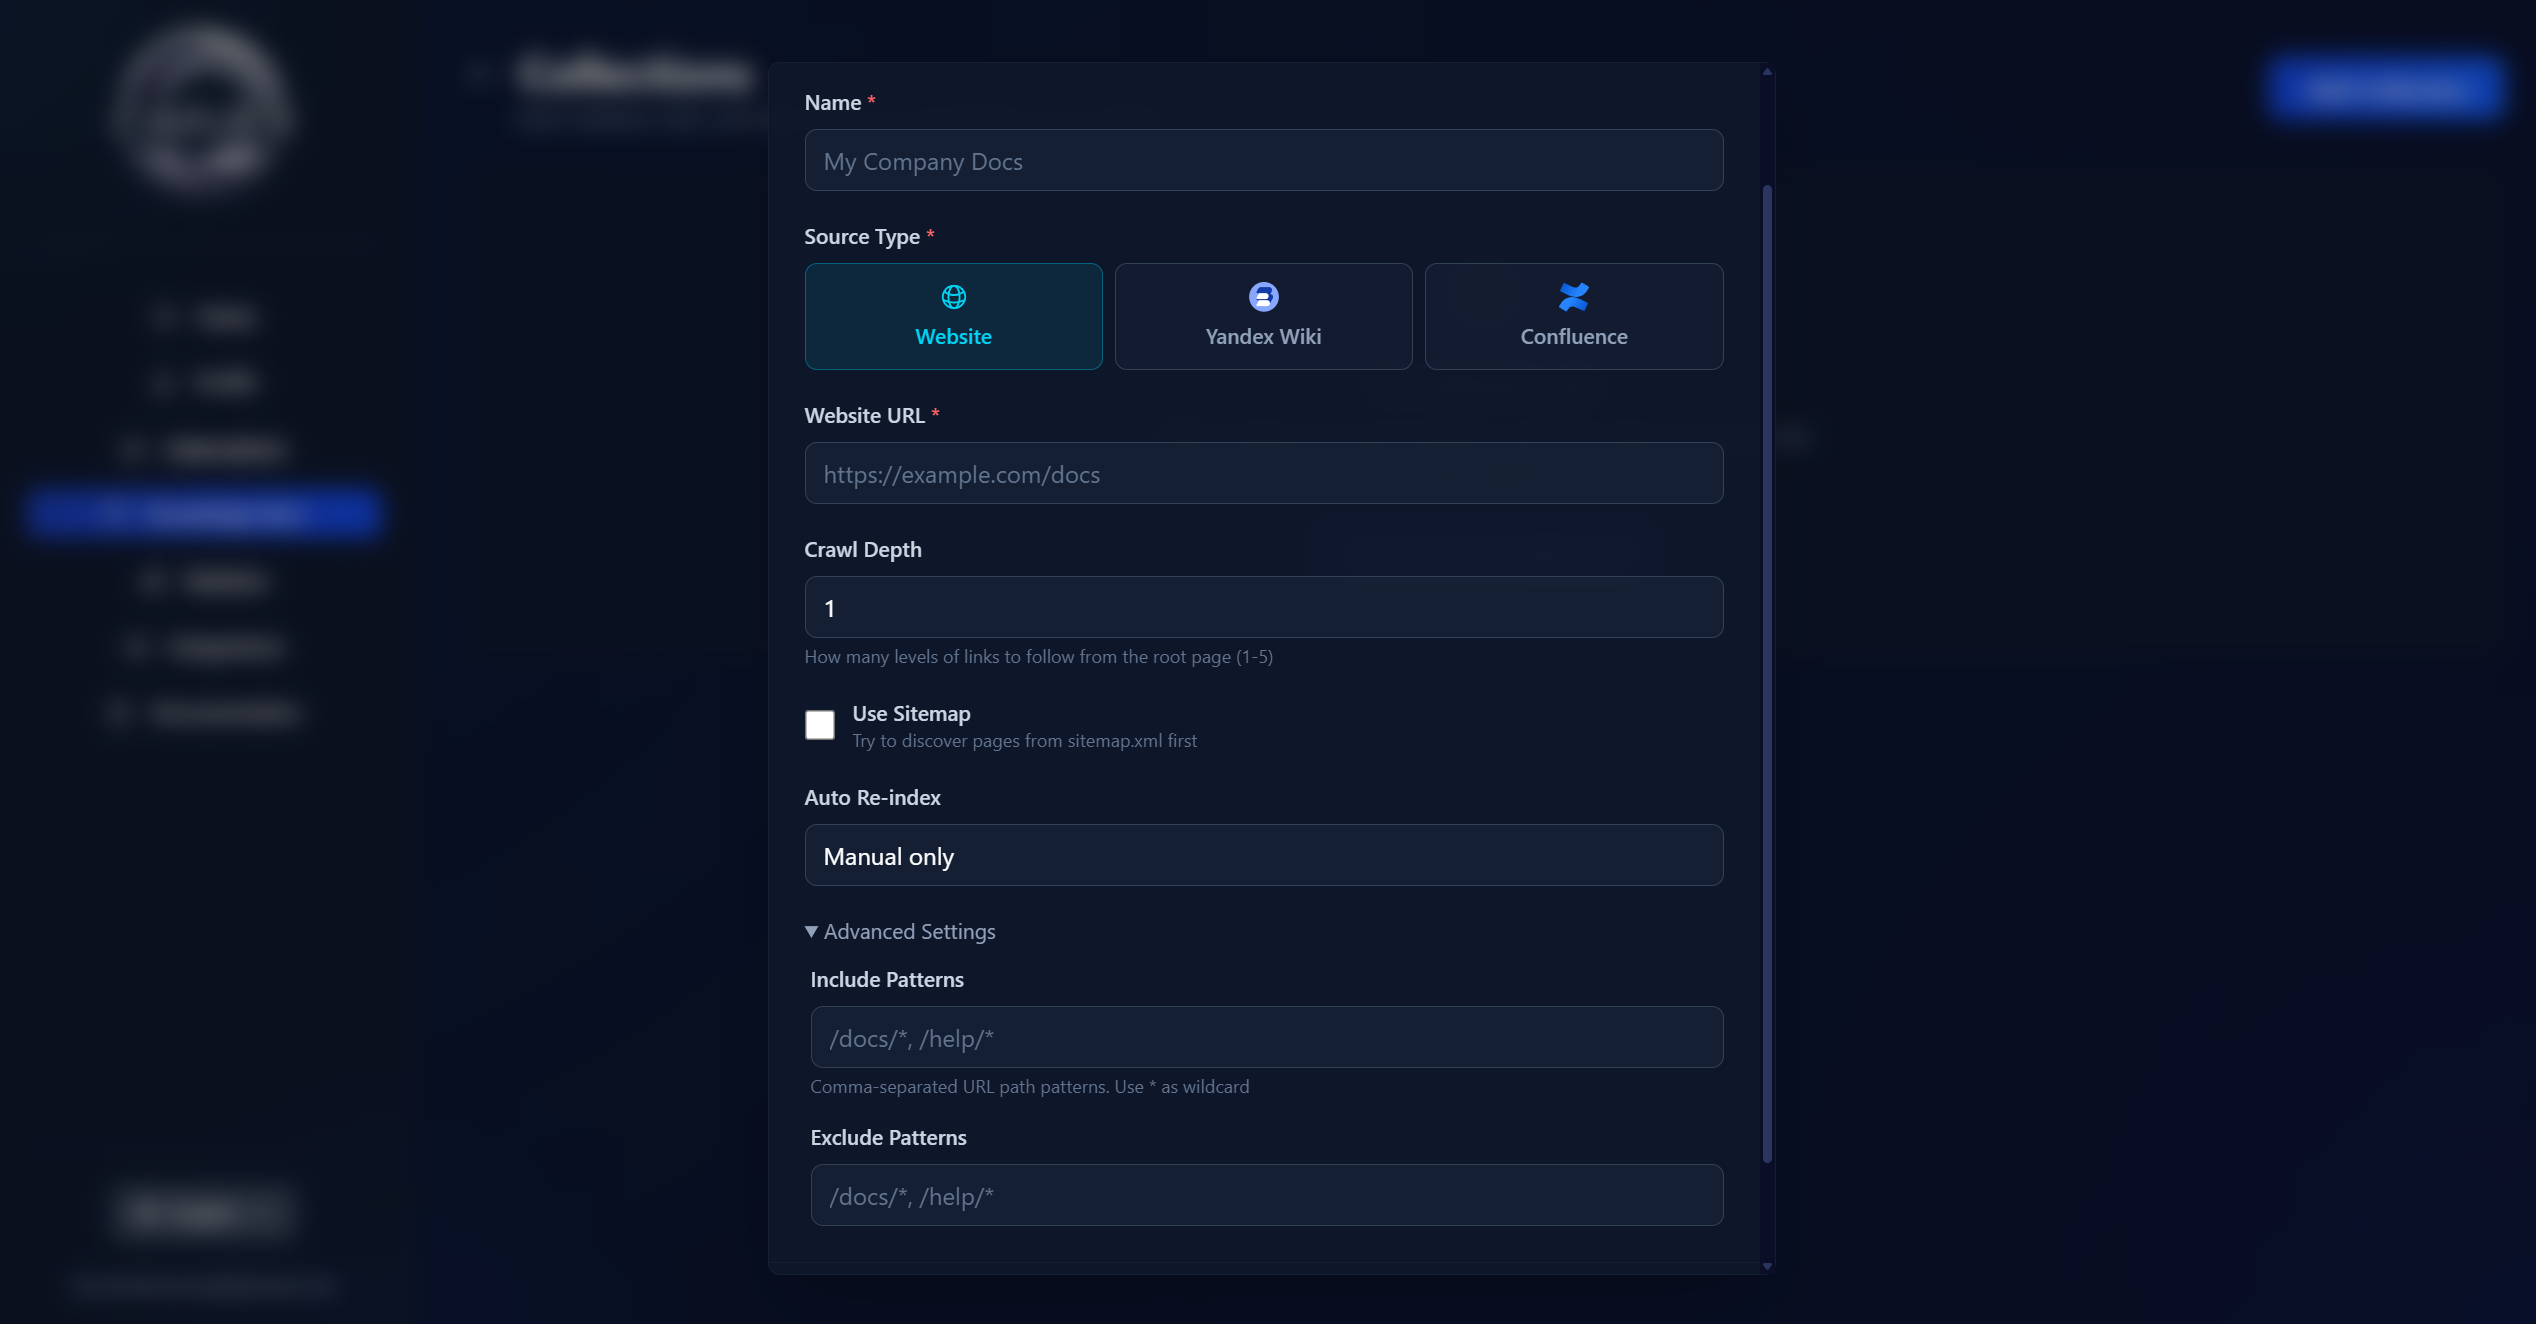
Connection parameters:
- Name — an arbitrary name for the collection
- Website URL — the root address for scanning
- Crawl depth — how many link levels to traverse from the root page (1–5)
- Use Sitemap — first try to discover pages via
sitemap.xml - Auto-update — frequency of re-indexing (default "Manual only")
In the Advanced settings, you can specify Inclusion patterns and Exclusion patterns for URLs (/docs/*, /help/*, etc.) separated by commas, using * as a wildcard.
 Yandex Wiki
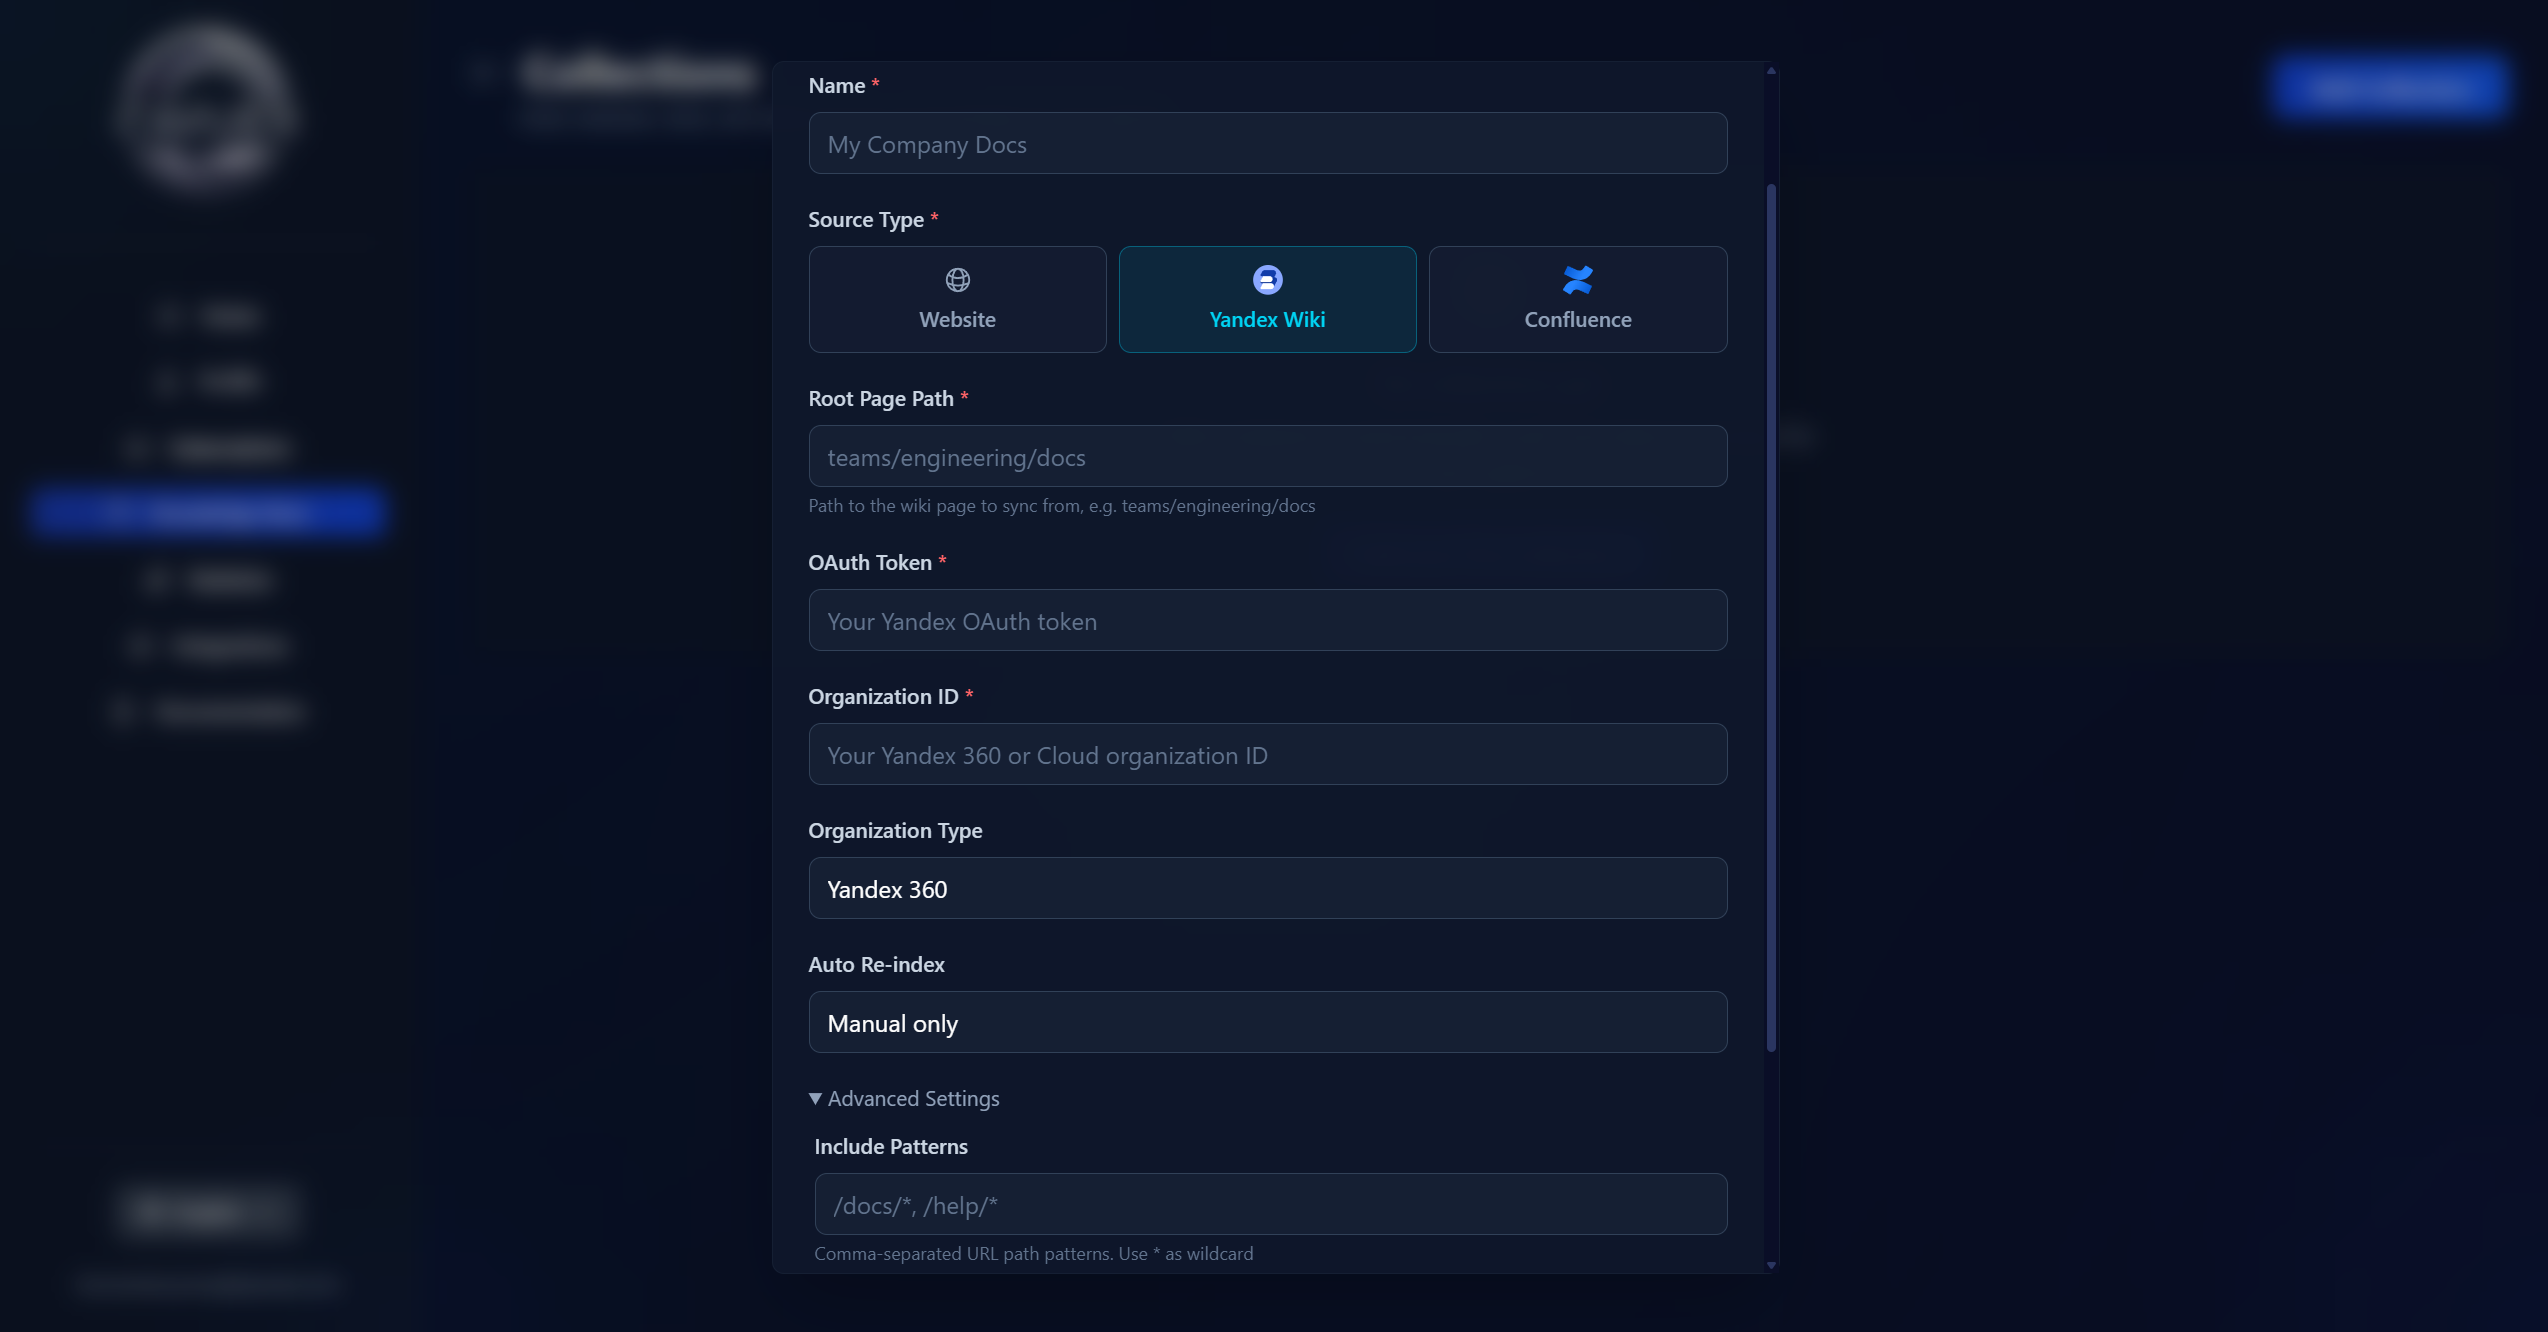
To connect, you will need:
- Path to the root page — for example,
teams/engineering/docs - Yandex OAuth token
- Organization ID for Yandex 360 or Cloud
- Organization type — Yandex 360 or Yandex Cloud
- Auto-update — frequency of re-indexing (default "Manual only")
In the Advanced settings, you can specify Inclusion patterns and Exclusion patterns for URLs (/docs/*, /help/*, etc.) separated by commas, using * as a wildcard.
 Confluence
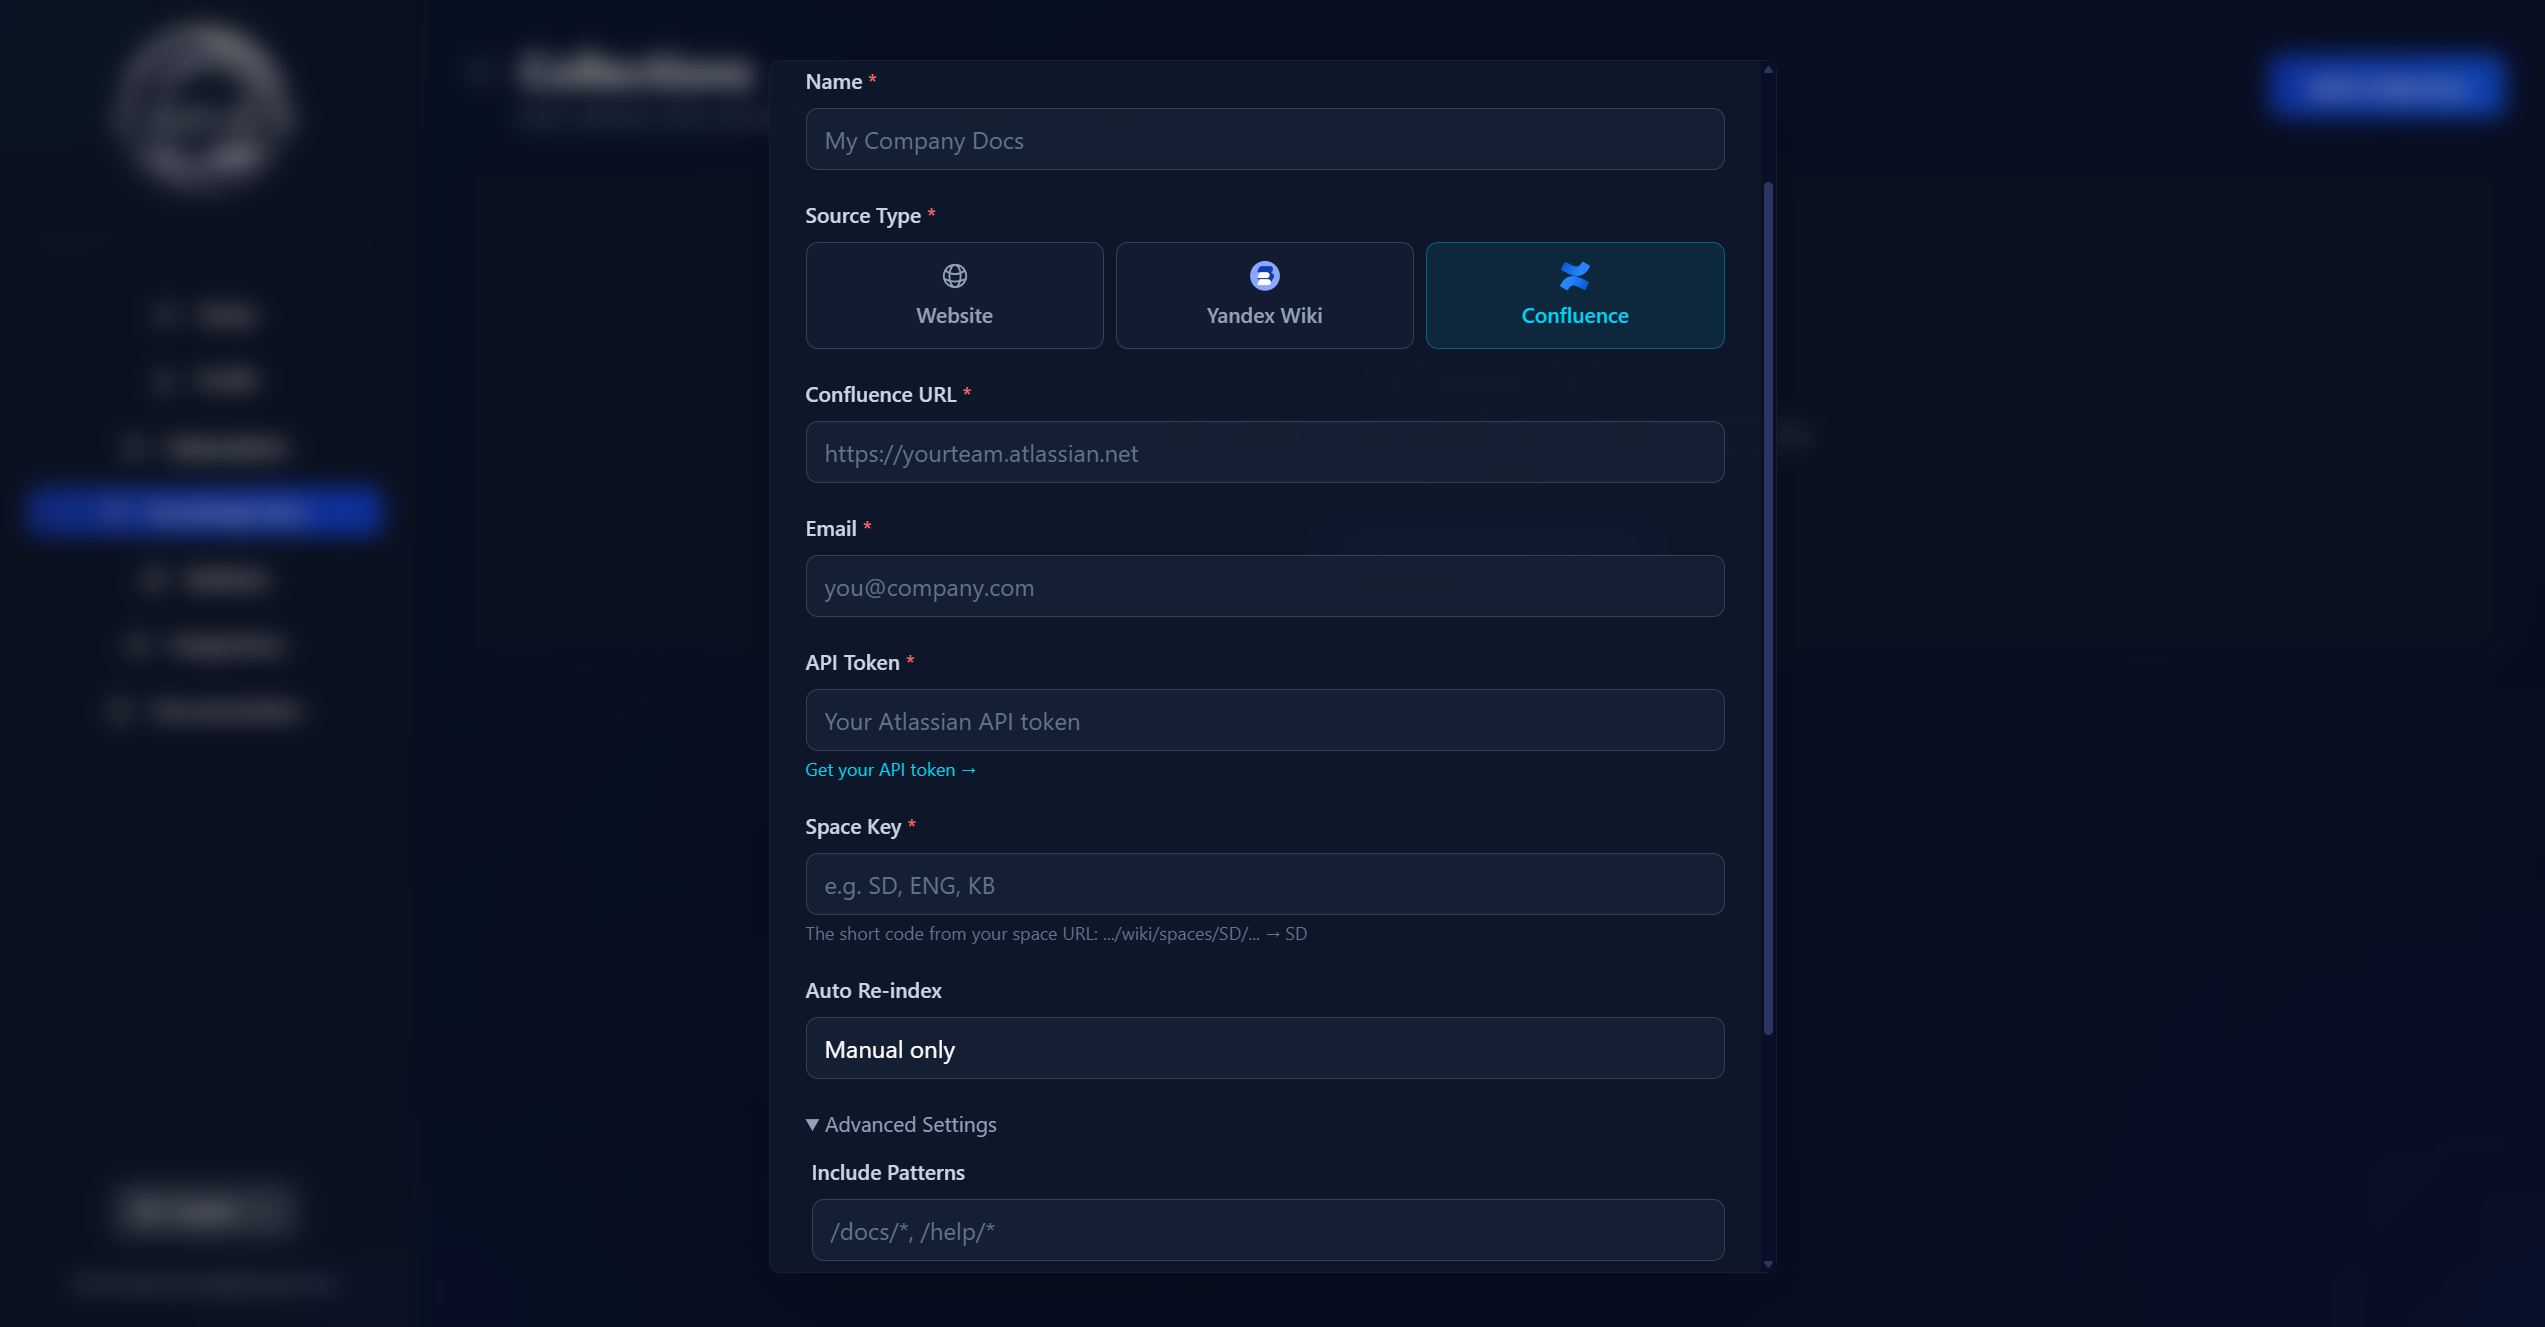
To connect, you will need:
- Confluence URL — the root address, for example,
https://yourteam.atlassian.net - Email — your Atlassian account
- Atlassian API token (to obtain a token, follow this link)
- Space key — a short code from the space URL, for example,
…/wiki/spaces/SD/…→SD - Auto-update — frequency of re-indexing (default "Manual only")
In the Advanced settings, you can specify Inclusion patterns and Exclusion patterns for URLs (/docs/*, /help/*, etc.) separated by commas, using * as a wildcard.
Managing collection pages
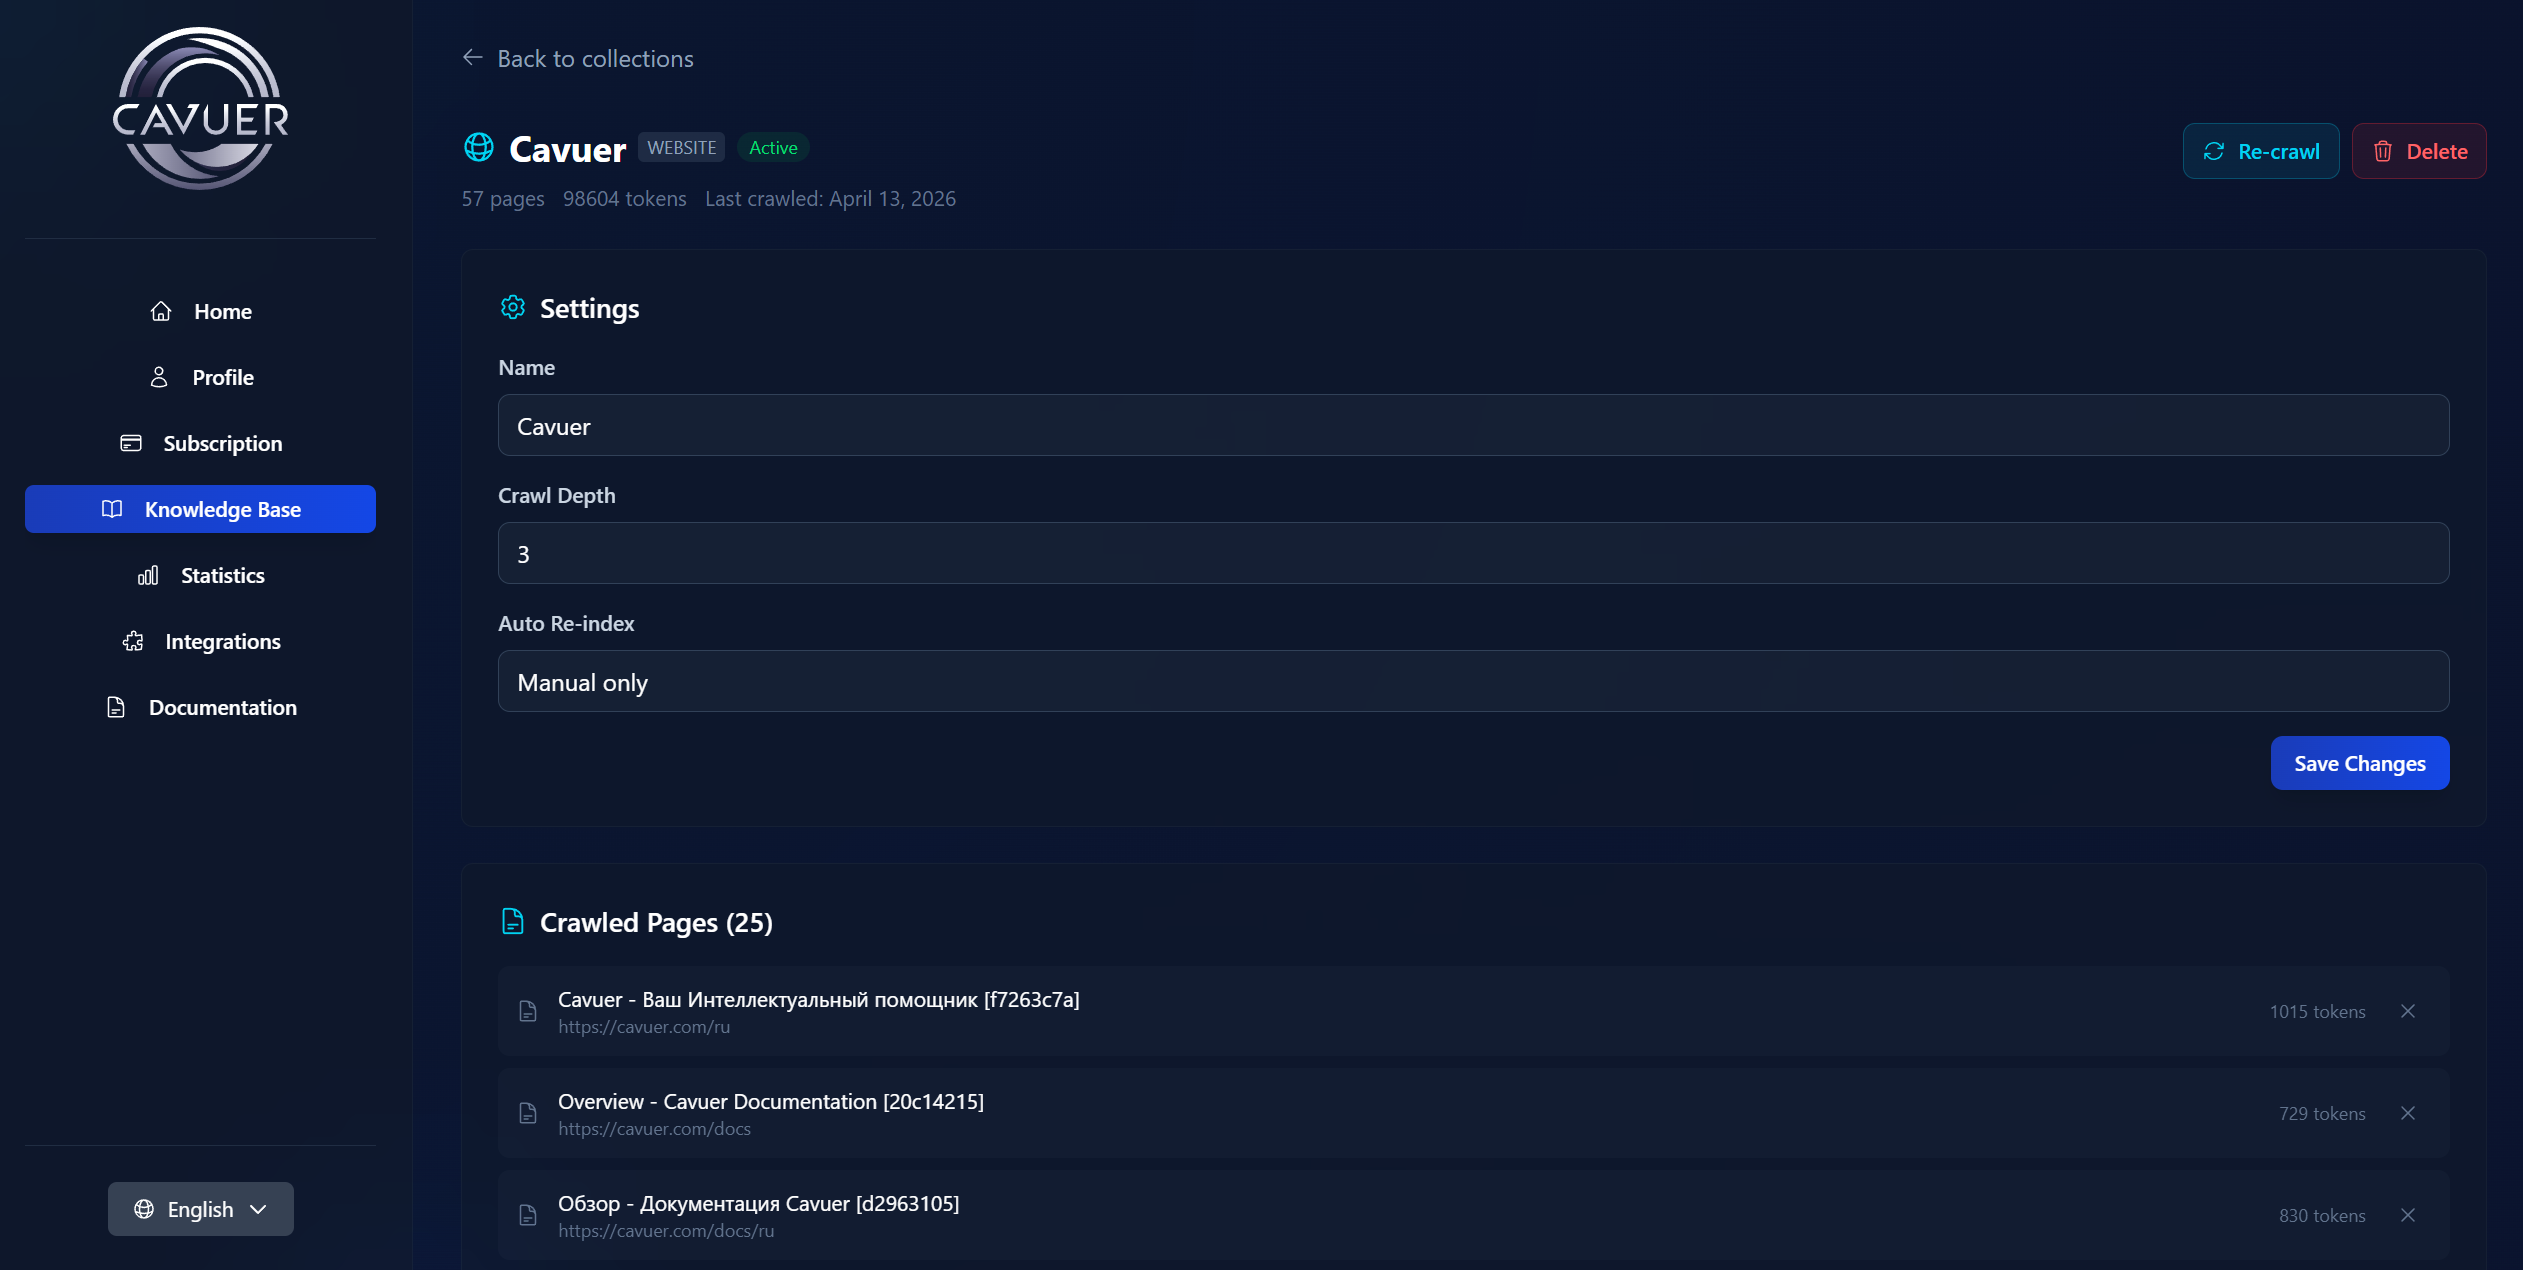
After a collection has been built, its settings page displays a list of scanned pages. If needed, you can configure the collection:
- Delete unnecessary pages that should not be used by the agent
- Rescan the collection to update its content
- Change settings of the collection
- Delete the entire collection
Tip
Remove pages from the collection that are not relevant to answering customer questions (for example, service or technical sections of the website). This will improve the search accuracy for relevant information.
Recommendations for preparing materials
 Titles and structure
-
We recommend using clear and informative titles for documents and collections.
Example
For a document about pricing, a more suitable title would be "Cavuer Pricing and Plans" rather than just "Price list".
-
Maximum title length: 255 characters.
-
The title cannot be changed after upload, but the content of the document can be edited.
 Content organization
-
Do not upload one long document covering all topics. Split materials into separate sources, each answering specific questions.
Organization example
Information about creating agents is better split into three separate documents: "Creating a Custom Agent", "Creating a Telegram Agent", "Creating a WhatsApp Agent".
-
For customers speaking different languages, prepare separate articles in each language, or add key terms in multiple languages to the document text.
 External links
If you already have detailed documentation on your website, upload a brief summary to the Knowledge Base and attach a link to the full version. The customer will get a quick answer from the agent and can follow the link for more detailed information if needed.
Connecting the Knowledge Base to the agent
Once sources and collections have been added, they need to be connected to the agent — otherwise the agent won't use them when responding.
- Go to the agent settings — Knowledge Base section
- Click the Link data button
- In the window that opens, select data on one of the tabs:
Individual knowledge sources
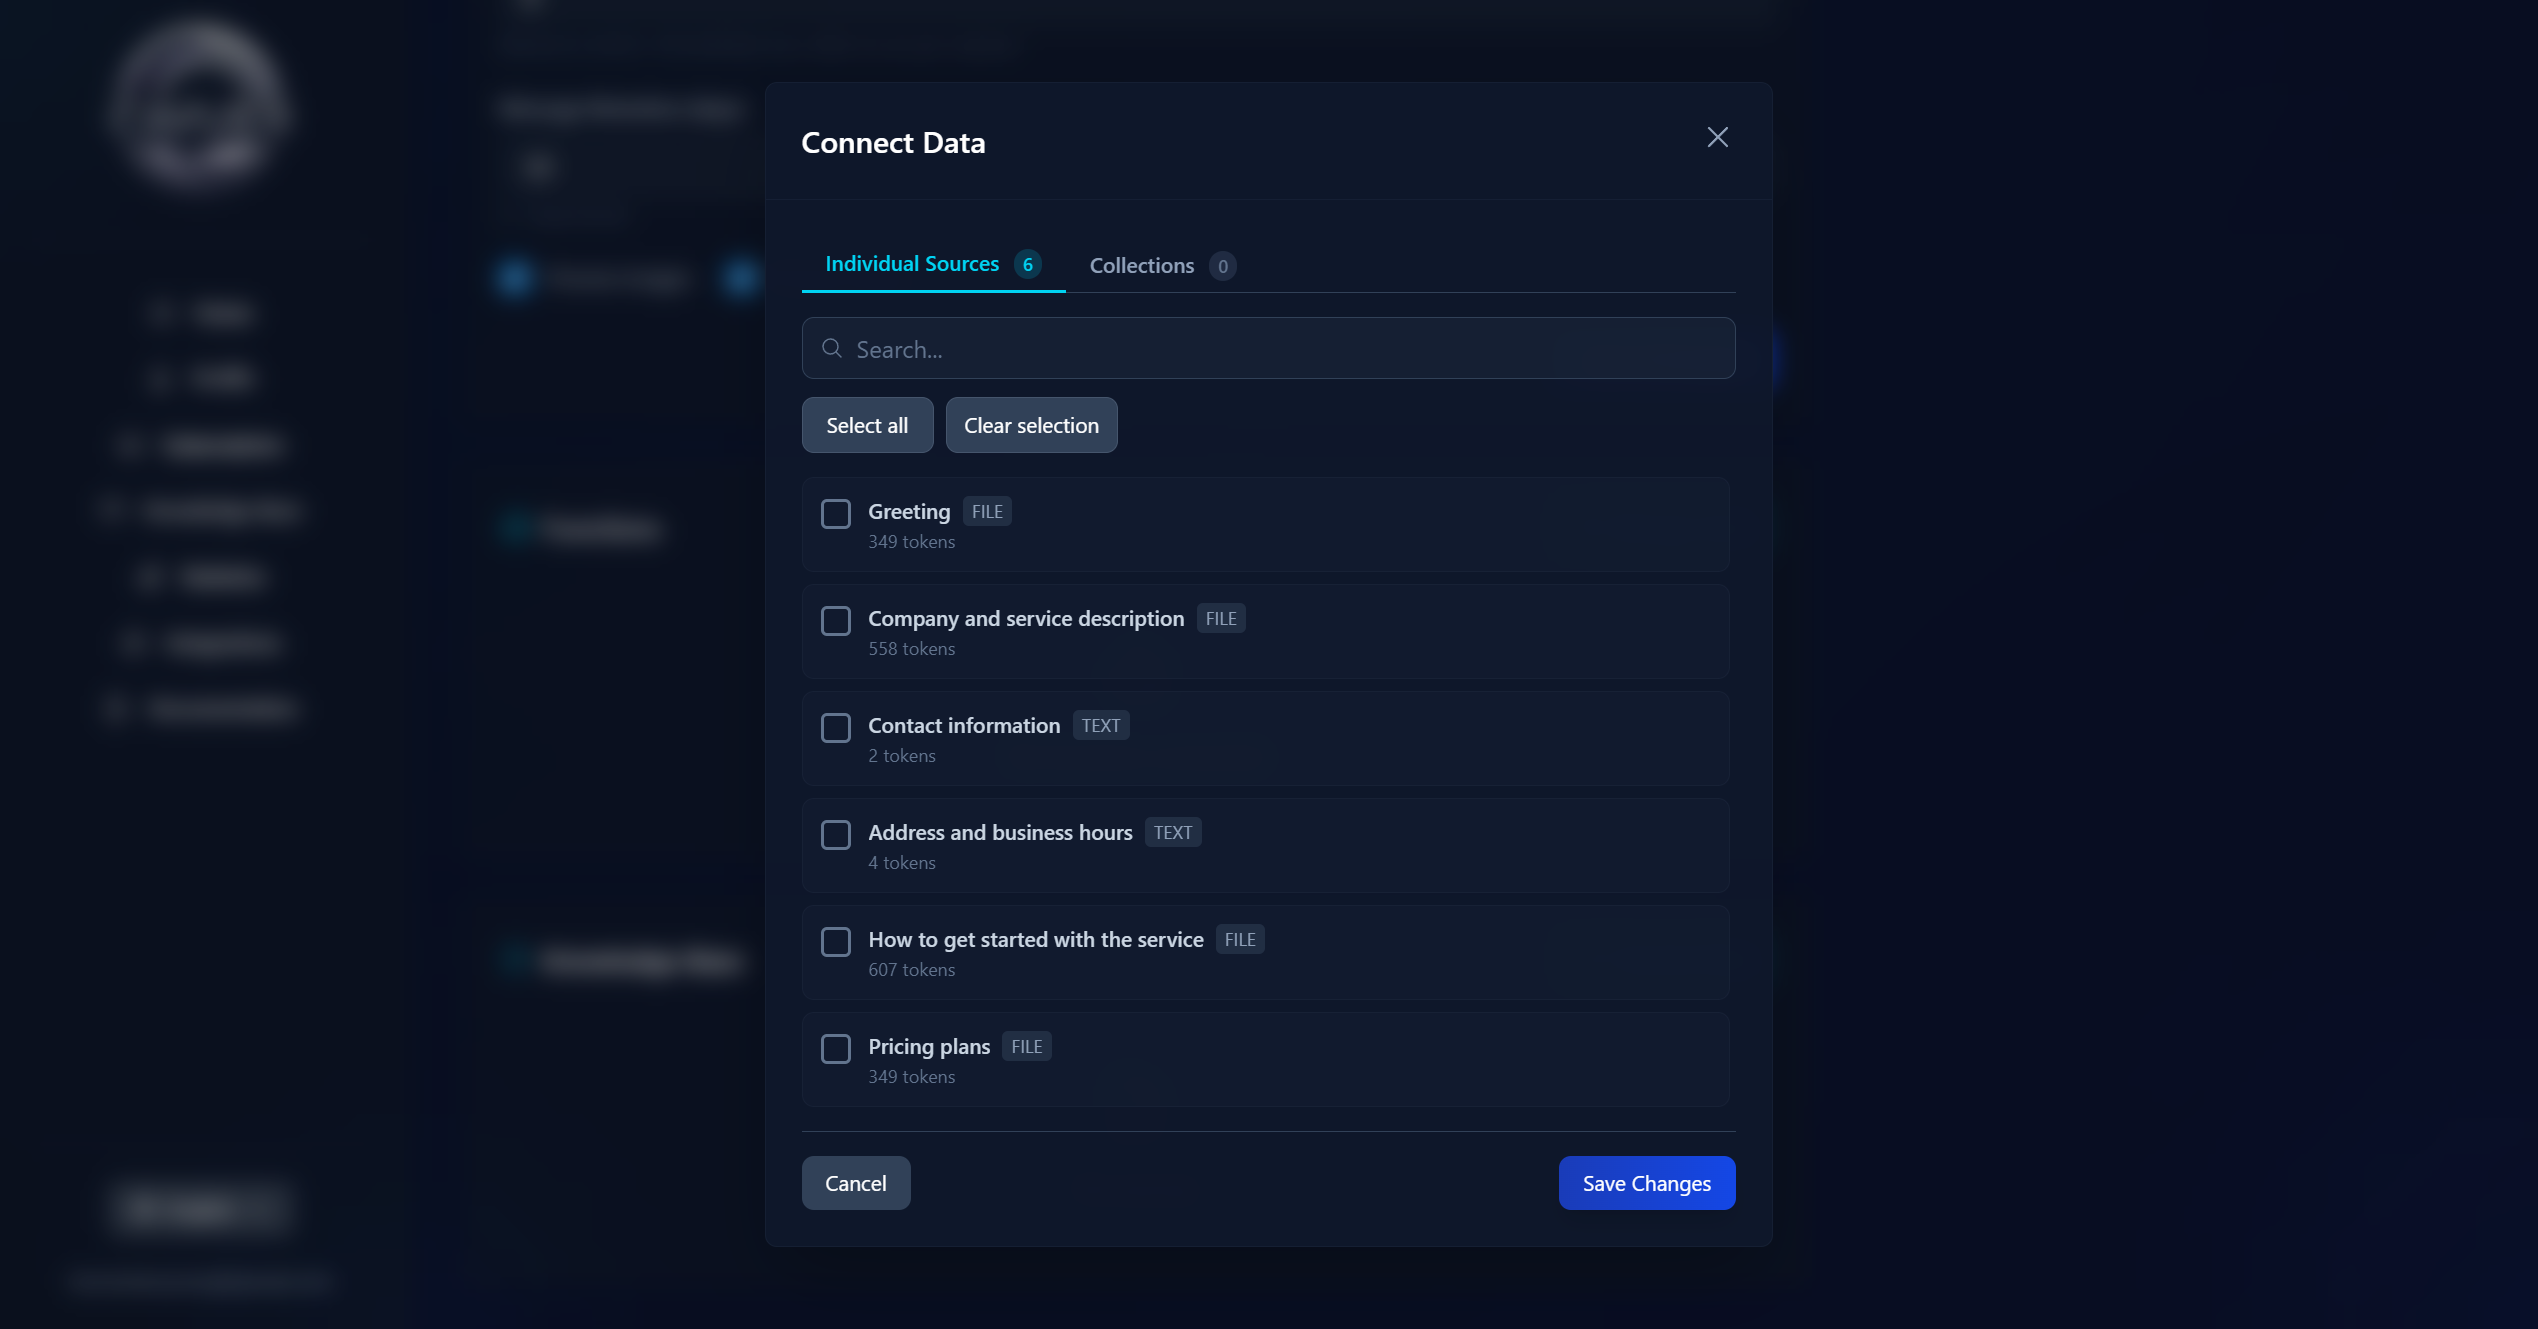
This tab shows all uploaded articles. Use Search, the "Select all" and "Clear selection" buttons for quick management.
Collections
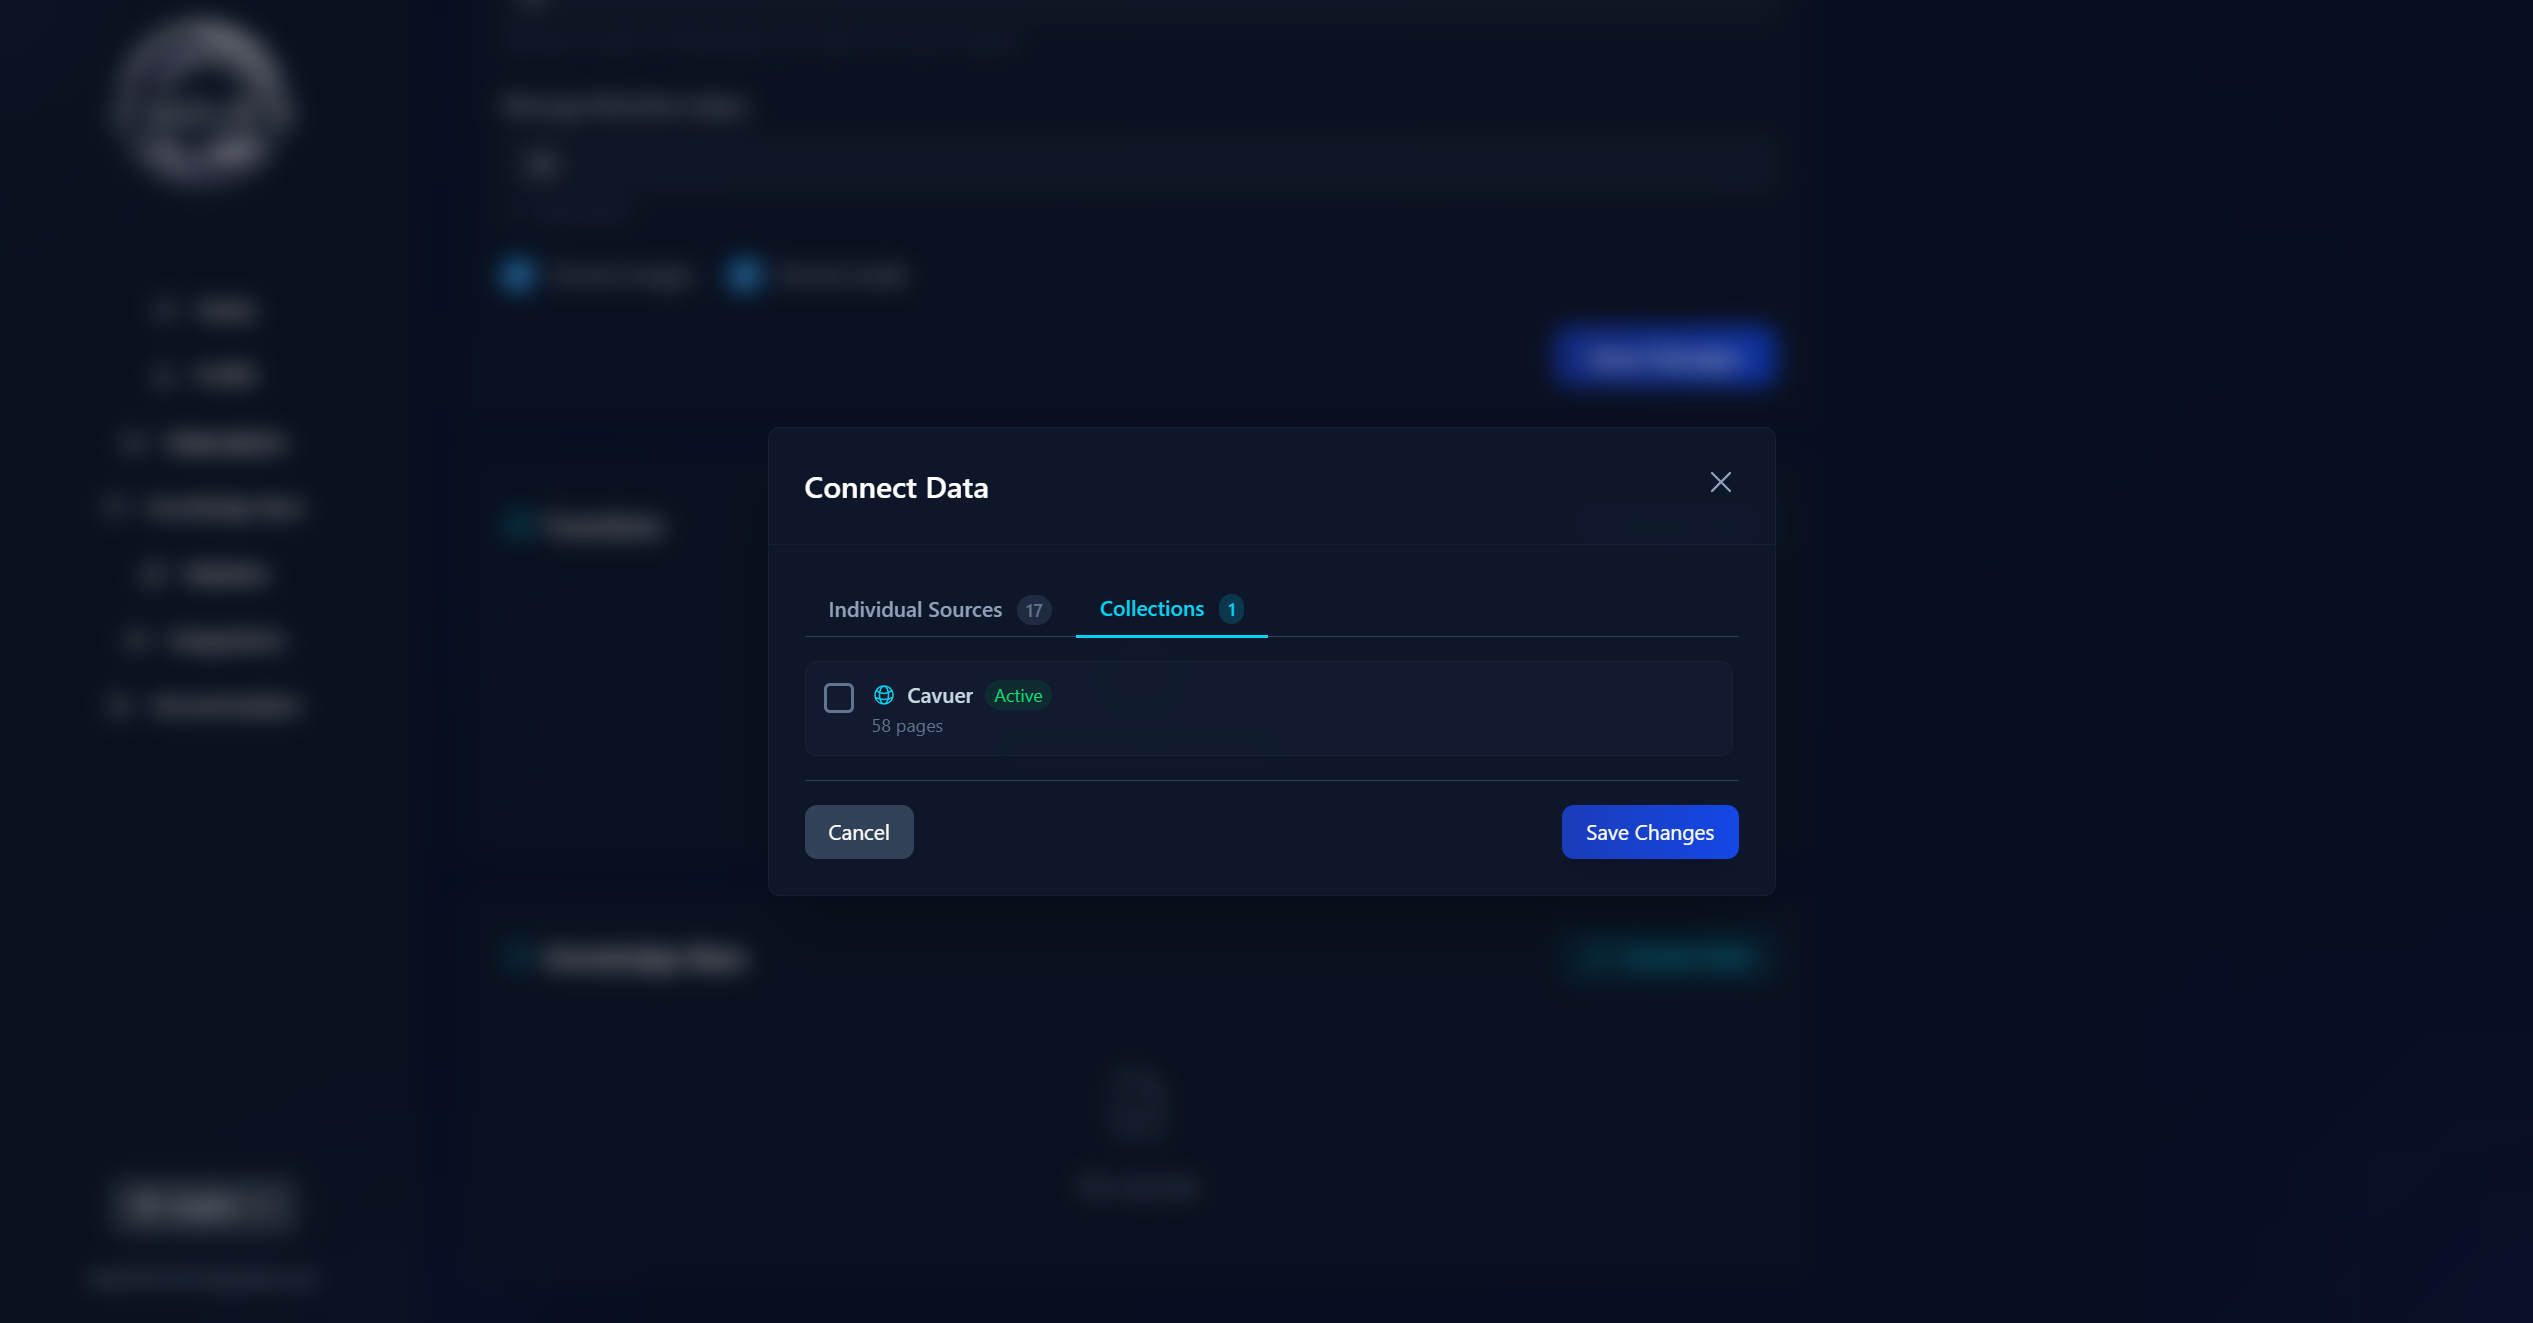
This tab lists all created Collections. You can link both "Individual sources" and "Collections" to the agent at the same time.
After making your selection, click "Save".
Best results
A well-organized Knowledge Base with clear titles, content split by topic, and properly linked sources significantly improves the accuracy of responses.
Next steps
Test the agent and the channel after populating the Knowledge Base. We recommend reviewing additional materials:
- Agent and channel setup — description of all agent and connection channel settings
- Use in groups — agent behavior in group chats
- Personal account — full description of all sections